Week Twenty Three – Mary Berry’s Traditional Parkin

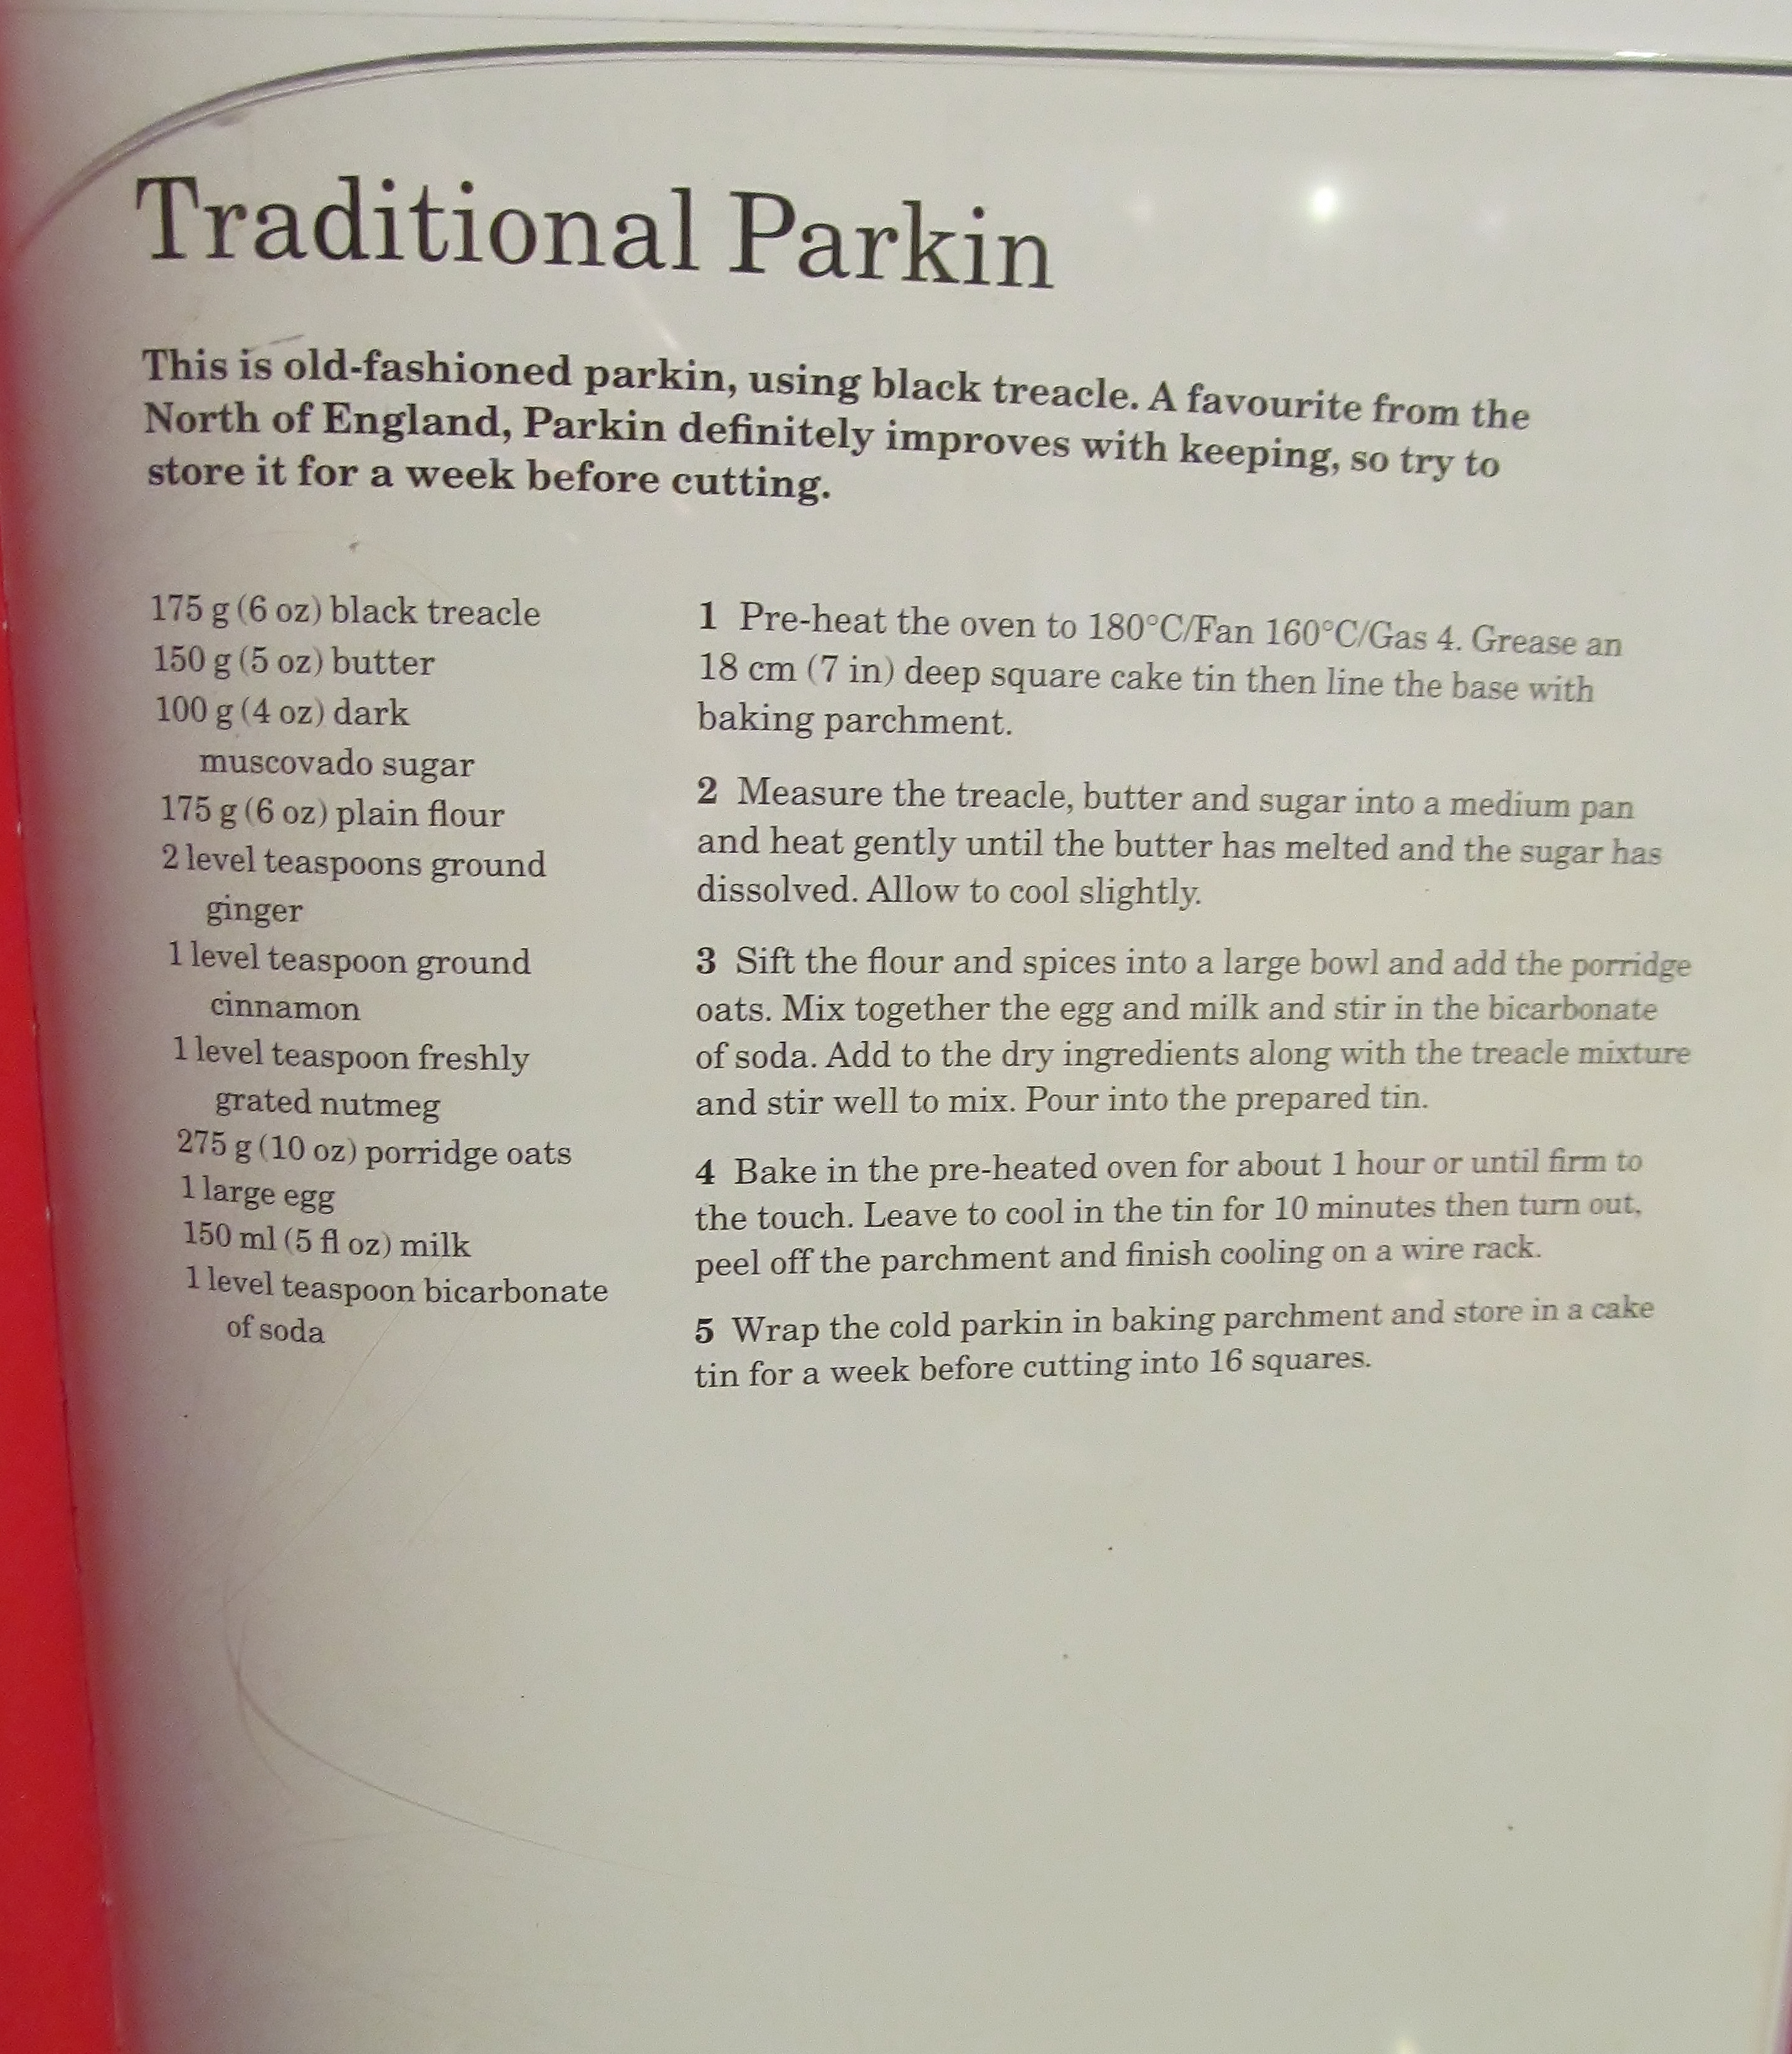
Parkin?? Until today, I had only vaguely heard of it and didn’t really know what it was or it’s origins. According to Mary Berry’s Baking Bible, it is ” a favourite from the North of England“……this got me curious so I tried to dig a little further into the history of this gingerbread type of cake.

I found a few variations of it’s “history” but little seems to be known about where it started other than- “Parkin is a traditional gingerbread eaten in Autumn, in Yorkshire. It is a sweet and sticky cake that is perfect for long winter evenings. Often associated with NorthYorkshire, particularly the Leeds and York regions, the origins of parkin are not known. It is also baked in other Northern regions such as Lancashire. Parkin is a moist and sticky cake which is traditionally eaten on Bonfire Night, but can be eaten all year round. Guy Fawkes was born in Yorkshire, and this tasty gingerbread, which originated in that area, is traditionally baked in November to celebrate the foiling of his plan to blow up the Houses of Parliament!The principal ingredients of parkin are white flour, oats, black treacle or molasses, butter and ginger. All these ingredients were important constituents of Northern, working-class diet in the late 18th and early 19th centuries, so it is likely that parkin evolved in that period. It is a cheap and filling cake that is distinguishable for its dark colour and lovely rich consistency.”

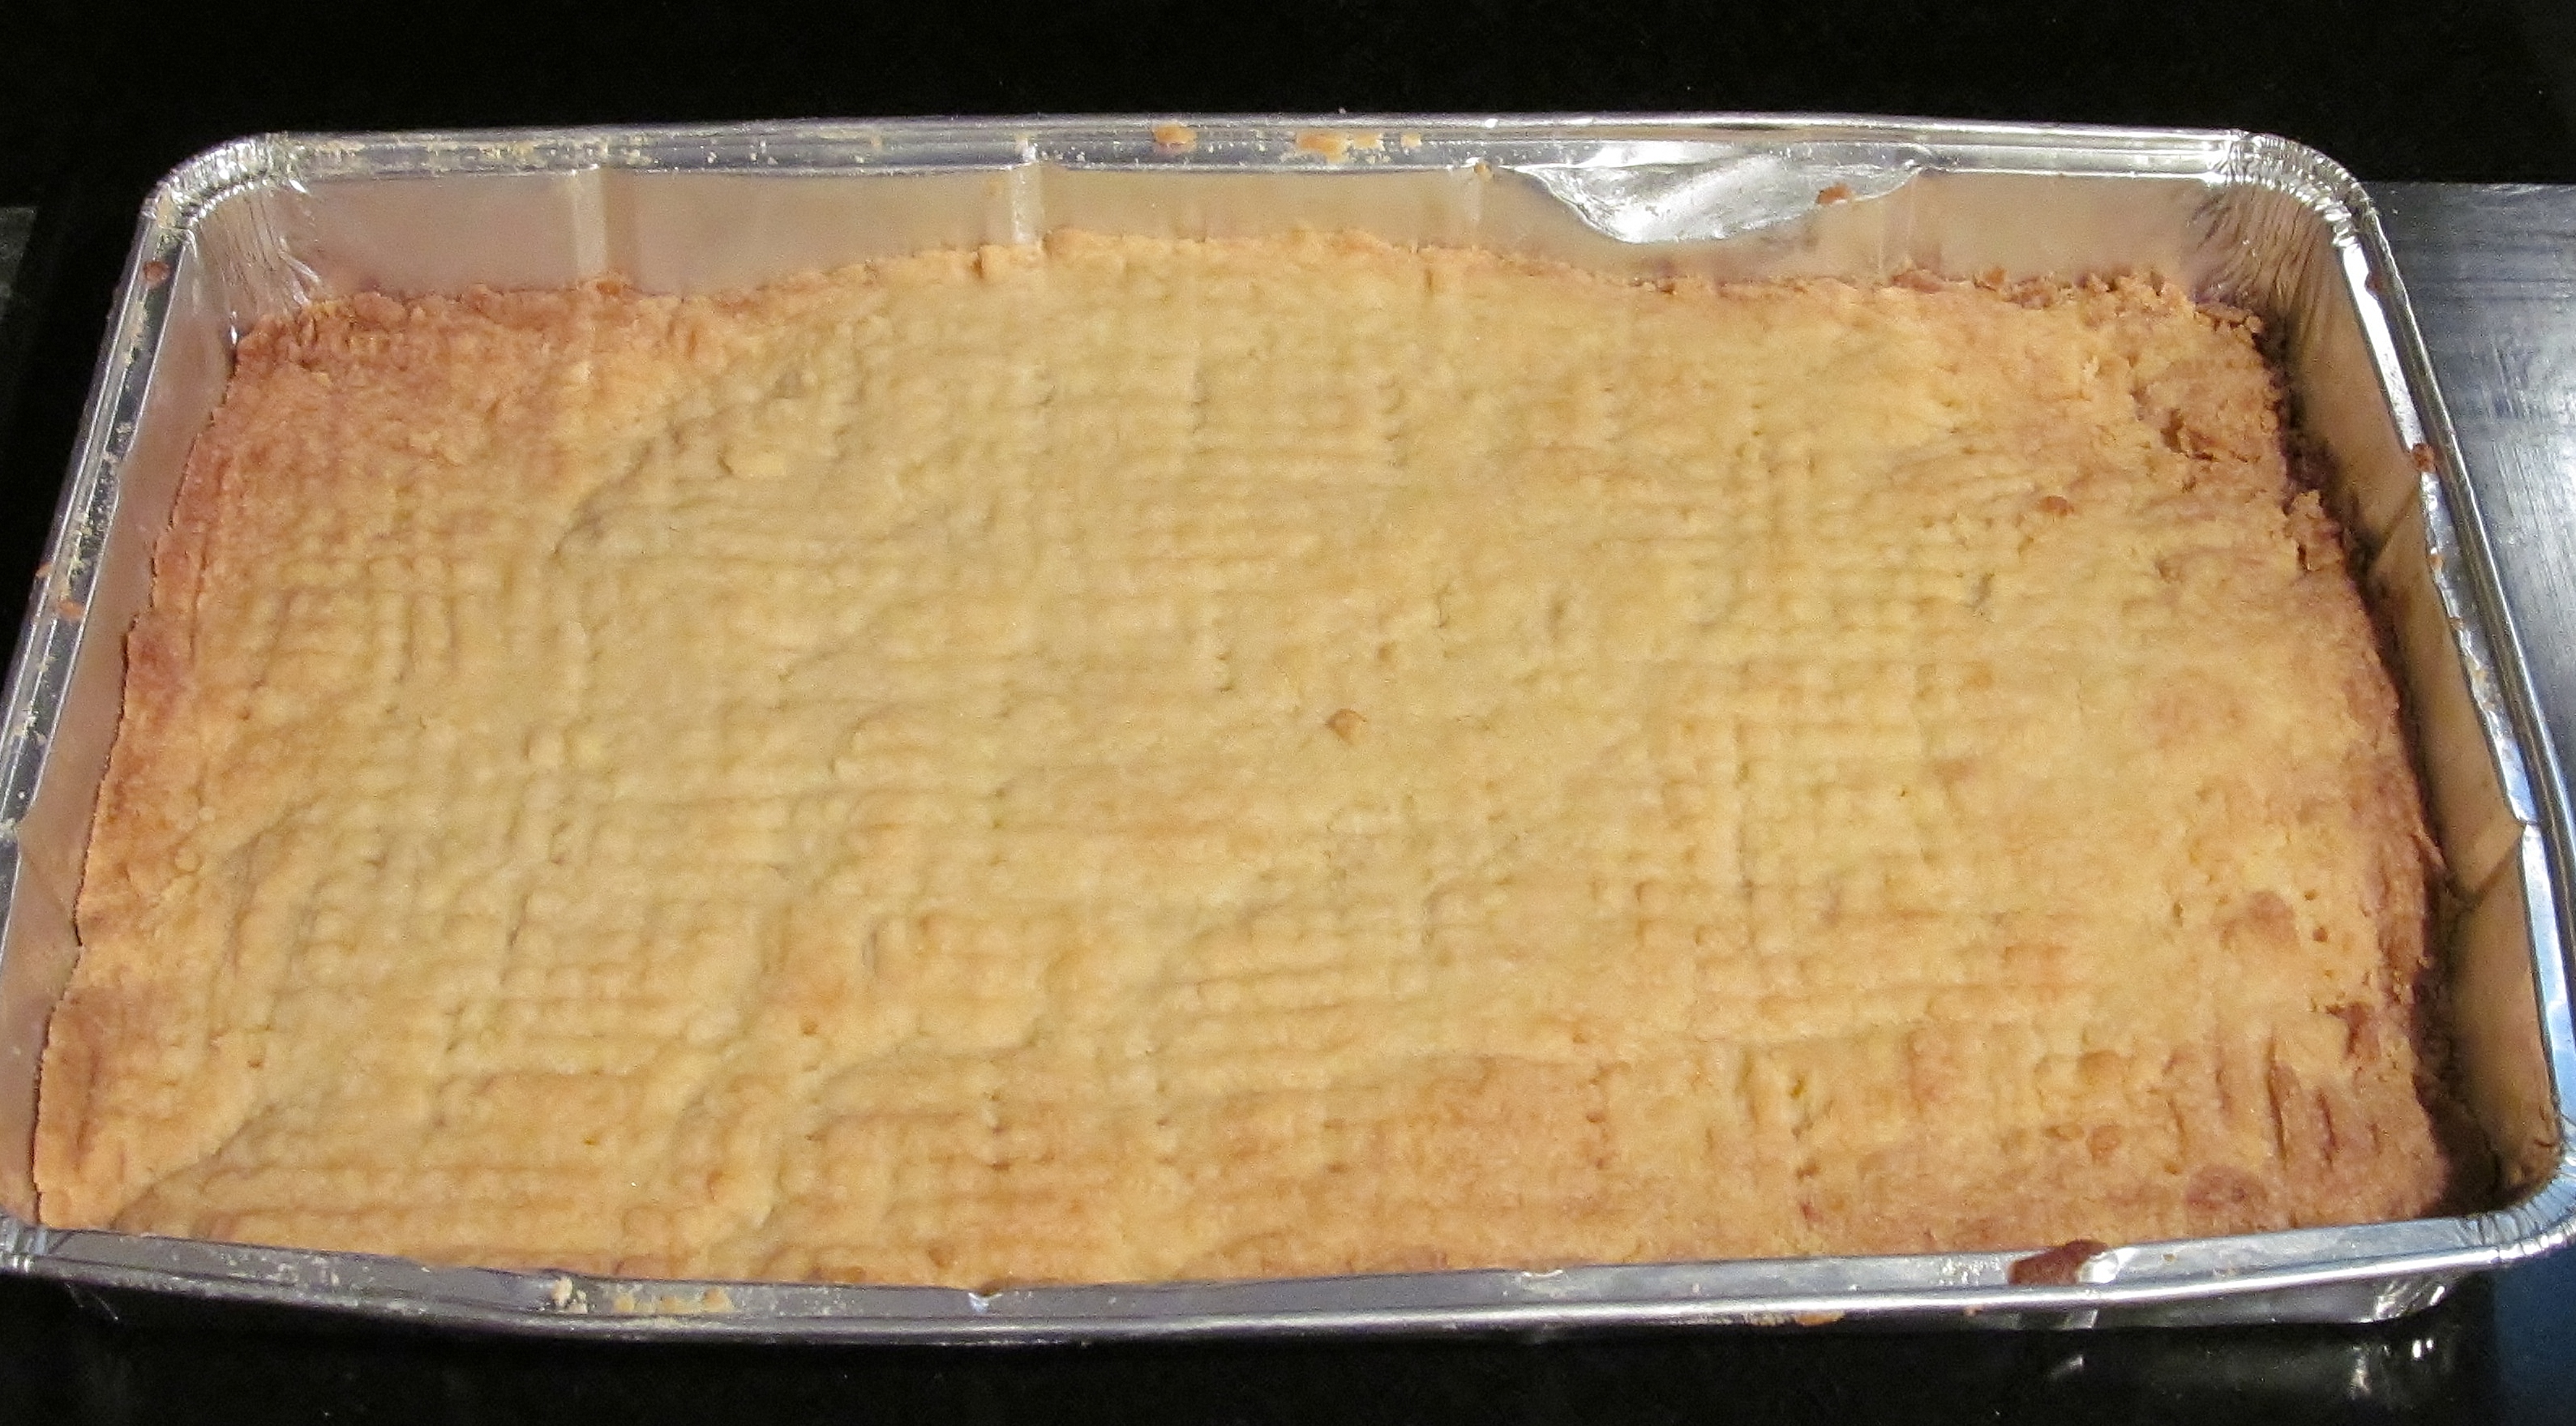
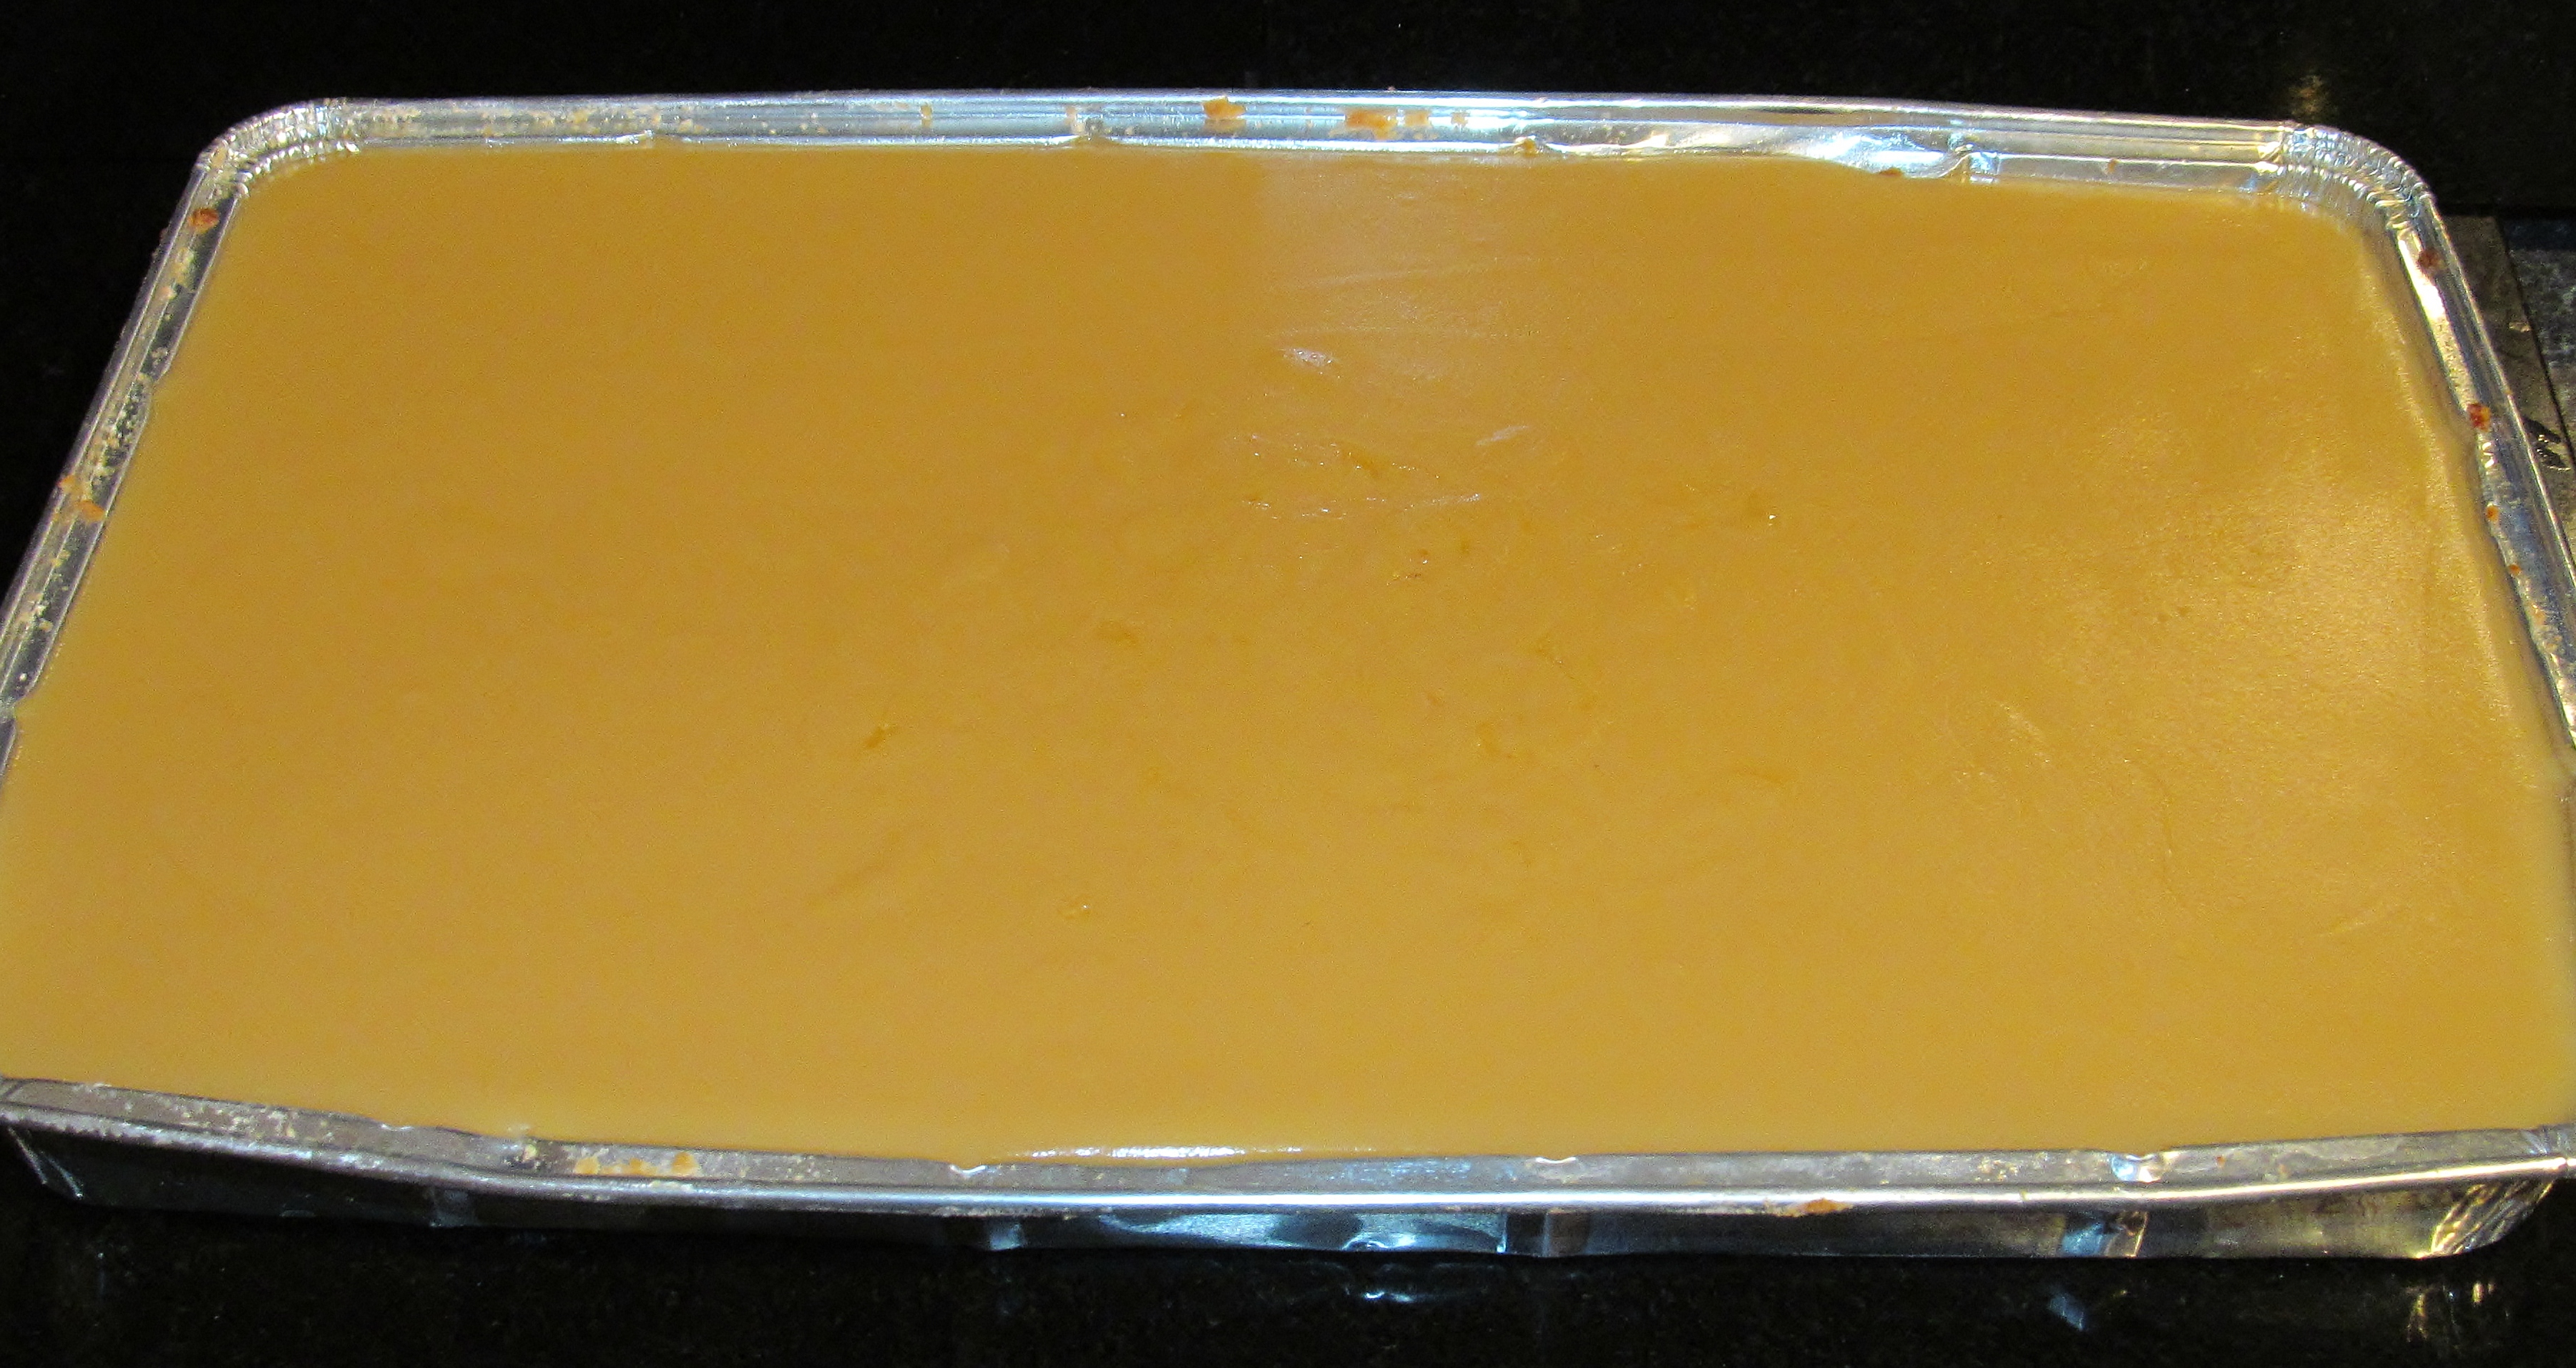
So , with Mary’s recipe in mind, I melted the butter with the black treacle and dark sugar. I had put the dry ingredients of flour, spices and porridge oats in a bowl and in a jug had the milk, egg and bicarbonate of soda. Once the butter and treacle had dissolved the sugar, I let it cool and then mixed all the ingredients together. Into the prepared tin it went and into the oven for an hour.

Mary Berry's Traditional Parkin

My dogs were hanging around drooling, like they always do when I am baking but they were out of luck , no drips, no bowl to lick as they have both put weight on and need to watch their waist lines!!

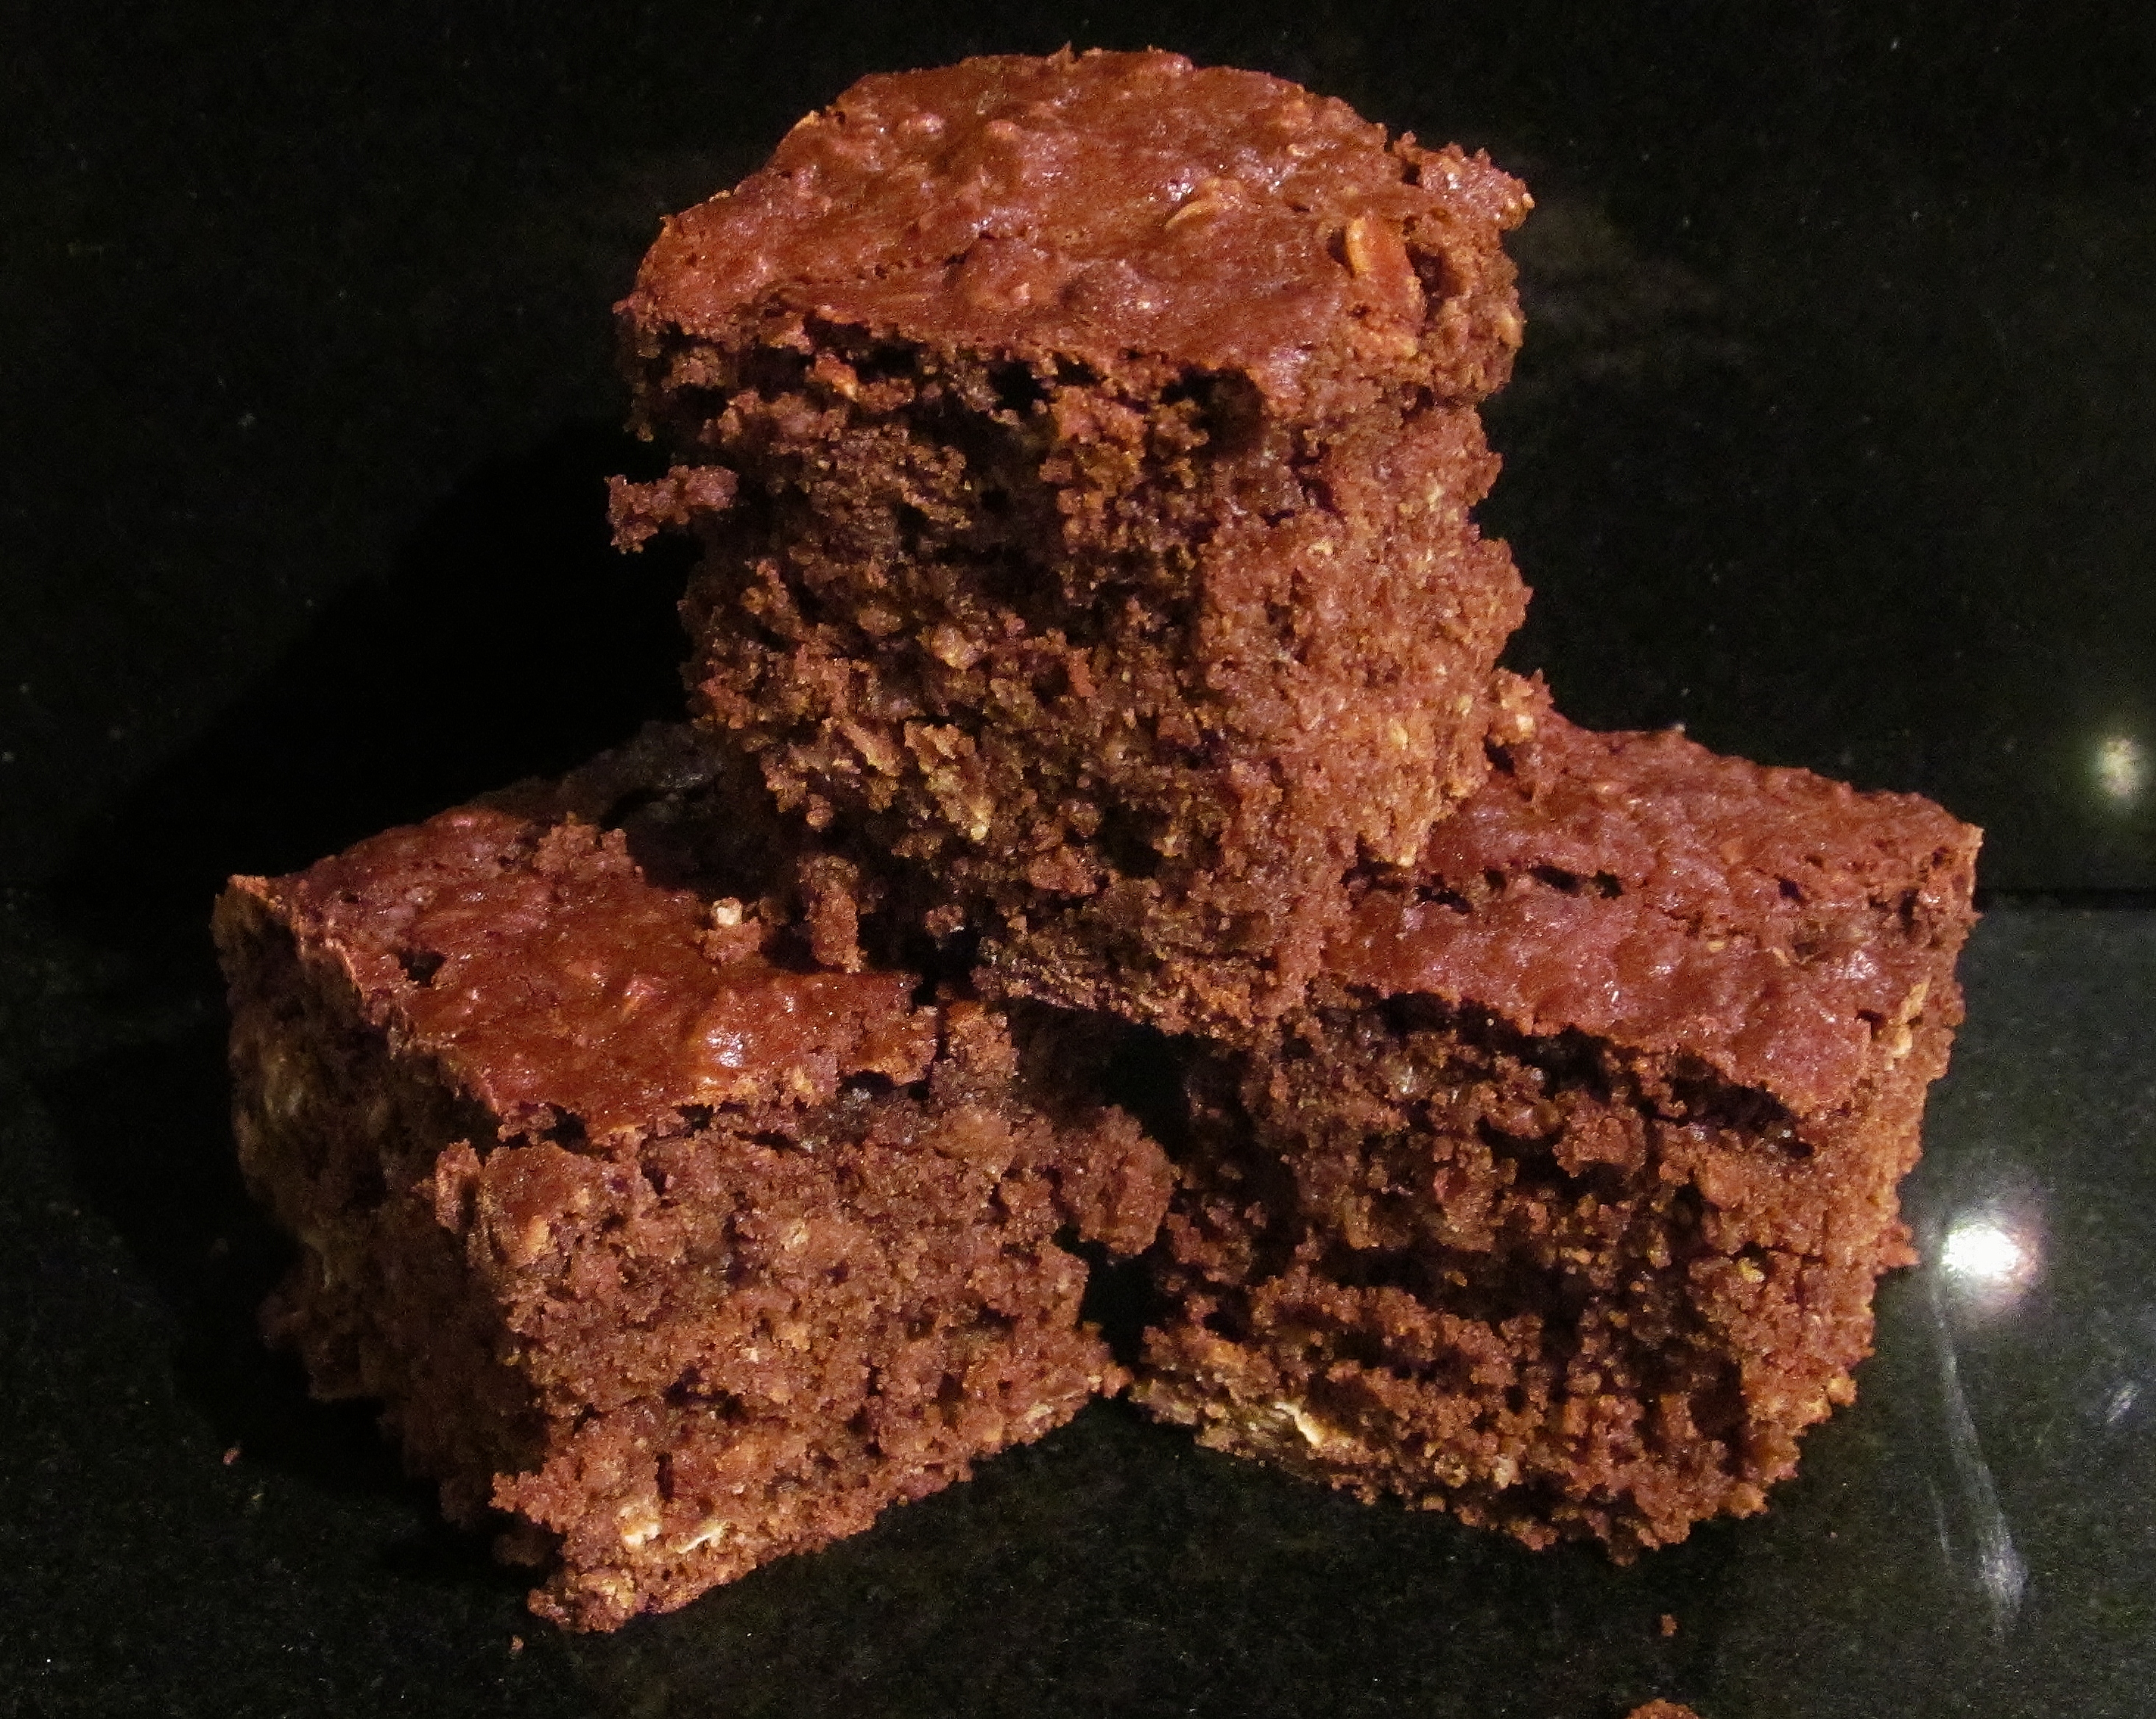
PING went the timer after an hour and I took the parkin out, it was dark and firm (!) and I left it in it’s tin for Mary’s recommended 10 minutes, then put it on the cooling rack. When it was cool, I cut it into squares and have put it away for a week as apparently it will be much nicer…..according to Mary!

Kim's parkin

Although it’s not November, as is traditional, it’s bloomin’ cold outside, we have coal in our fuel burner and the dogs are laying on their bed in front of it- I think that qualifies!

Week Twenty Two – Mary Berry’s Classic Apple Pie

As I still have a good amount of last week’s bake left in the fridge, I wanted to bake something that we could eat for pudding this week so I chose Mary Berry’s classic apple pie recipe.

Mary Berry's Classic Apple Pie

I picked out several lovely apples in Morrisons while doing my weekly shop, and had the rest of the ingredients already. The only variation to the recipe was that Mary adds cloves to hers and we are not keen so I sprinkled some cinnamon on the apples.

Kim's apple pie filling

I cut the apples, sprinkled the sugar and cinnamon, added the water and rolled my pastry. Then I needed to decorate it in some way. For Christmas I got a roller that creates lattice work so I decided to try that- what a bad move!!! When it works it looks great but it sure isn’t as easy as it looks!!! I rolled and cut the lattice work and laid it on the top at least 6 times and took it off and re-rolled it until I was happier with it! I guess it will be easier with practice!!! I then used a leaf cutter to cut out some leaves to make the border and finish the pie.

Kim's unbaked apple pieKim's baked apple pie

I am happy with the way it looked and baked and hopefully when we eat some later with a little cream, it will taste as good as it looks!!!!

I have also looked through Mary’s book and realised how many more recipes I have yet to do so will try when possible to double up on a few more!

Week Twenty One – Mary Berry’s Millionaire’s Shortbread

Although this blog is a little late in being published, I made Mary Berry’s Millionaire’s Shortbread on Sunday. This brings back lots of childhood memories, my mother used to make this a lot but it was known as Wellington Squares in our house. As my dad loved these so much I have dedicated this recipe to his memory and renamed it to Billionaire’s Shortbread as his name was Bill………..

Anyhow,  the recipe was very familiar to me and I made it in one of the infamous Lakeland tray bake disposable tins which come in very handy. I have been aware of not taking so many pictures of various stages recently to have taken a few more this week as there are three distinct stages to this scrummy cake.

Mary Berry's Millionaire's Shortbread

The shortbread base is first and fairly easy to do, it’s just getting the balance of golden rather than burnt!

 Kim's Billionaire's Shortbread base

Then there is the caramel middle, Mary Berry is not wrong when she says stir ALL the time, if you don’t, it will catch and burn and you end up with burnt bits in it. This didn’t catch but it has done for me in the past so be careful.

Kim's Billionaire's Shortbread caramel middle

The topping is then the melted chocolate. Mary recommends just a plain top or a mix of plain, milk and white chocolate in a marble pattern. Traditionally in our house, it’s a milk chocolate topping with white lines and then swirled so that’s what I did and love the look of it. So here you have, Kim‘s Billionaire’s Shortbread in memory of my lovely Dad who was taken too soon by illness.

Kim's Dad Bill Kim's Billionaire's Shortbread

Oh and don’t forget to support the Comic Relief Bake Off and make a donation here:

http://http://www.rednoseday.com/whats-going-on/whats-on-tv/bake-off


Week Twenty – Mary Berry’s Eccles Cakes

Mary Berry's Eccles CakesWell, I am feeling better still this week and wanted to try something a bit more challenging so, I looked through Mary Berry’s baking bible and decided on the Eccles Cake recipe.

I have never made these before so it was a bit of a venture into the unknown as to what the outcome would be.
Mary’s recipe instructions are very detailed so I set off reasonably confidently on Sunday morning.

Eventually I was at the construction stage and that was the fun part! I cut out my circles in the pastry and put a table spoon of filling in each one, wet the edges and folded the pastry in to meet and seal, turned them over, shaped them into rounds , flattened them slightly and cut the 3 slots in them.

Kim's Eccles Cakes

Here are the results and I must admit, they tasted rather good! ? I seem to be back in the baking saddle and I am now looking through Mary’s book to see what I fancy making next week!