Week One Hundred & Twelve – Mary Berry’s Sticky Ginger & Orange Cake & Treacle Sponges

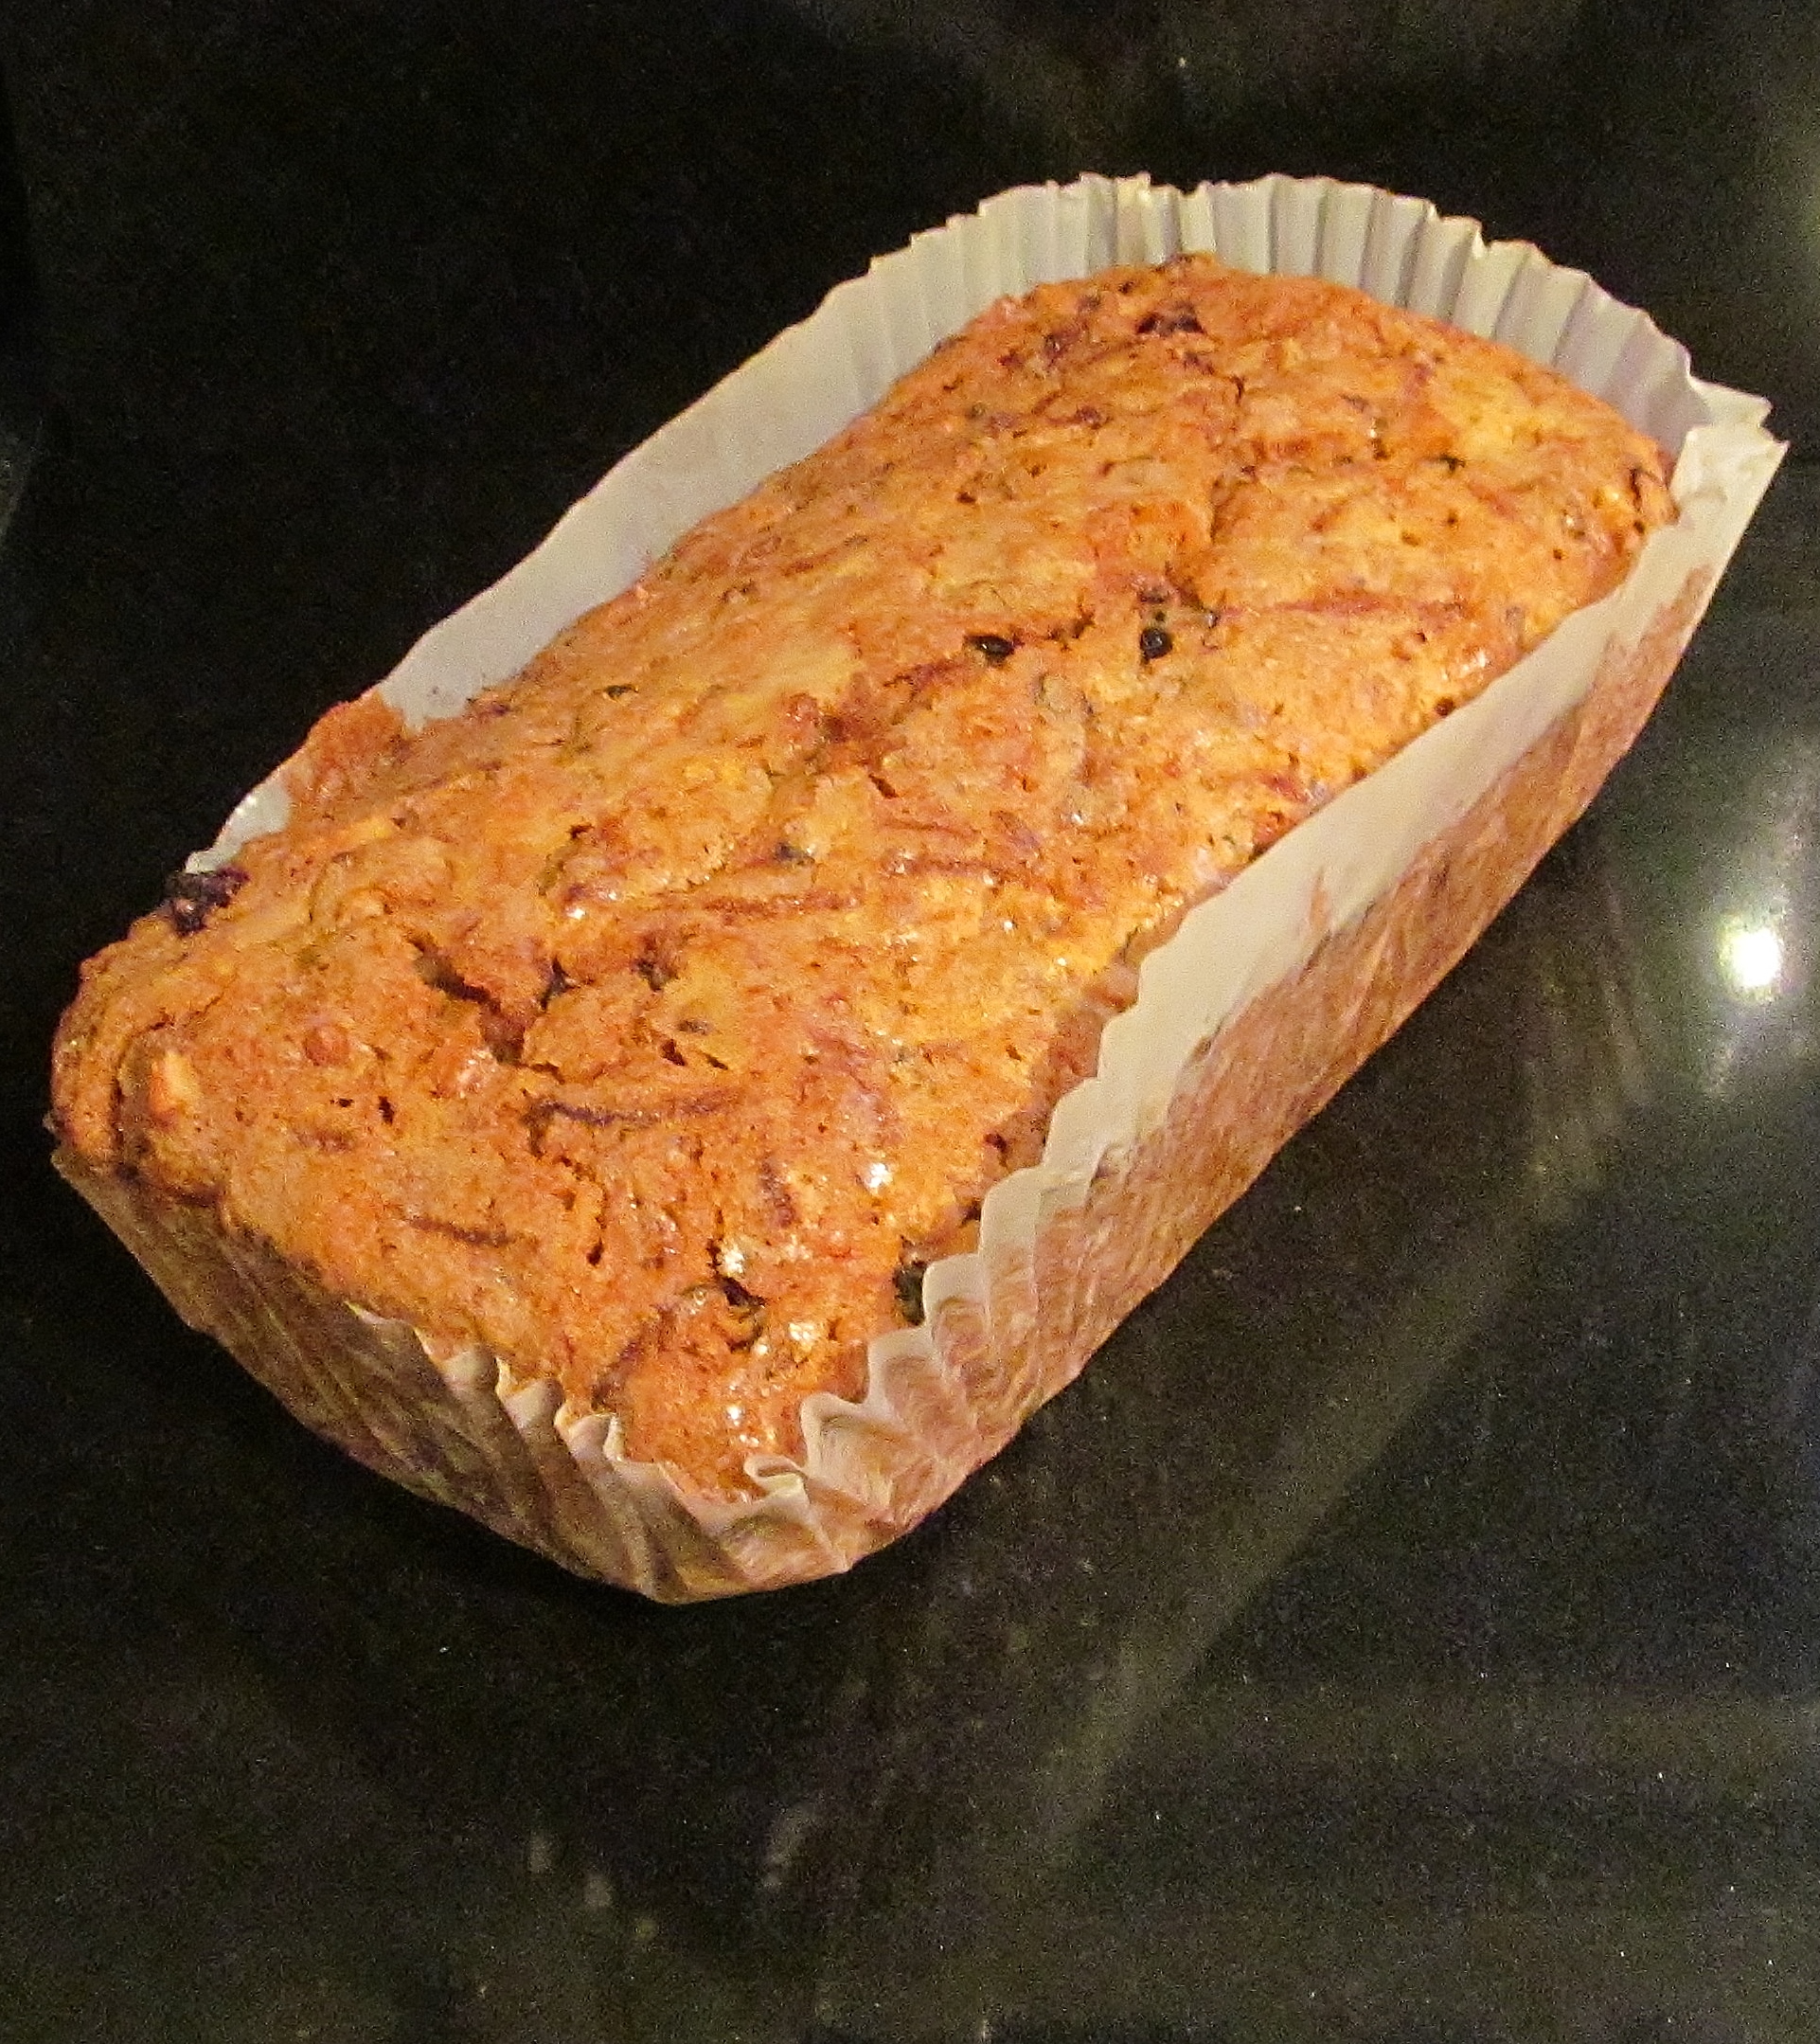
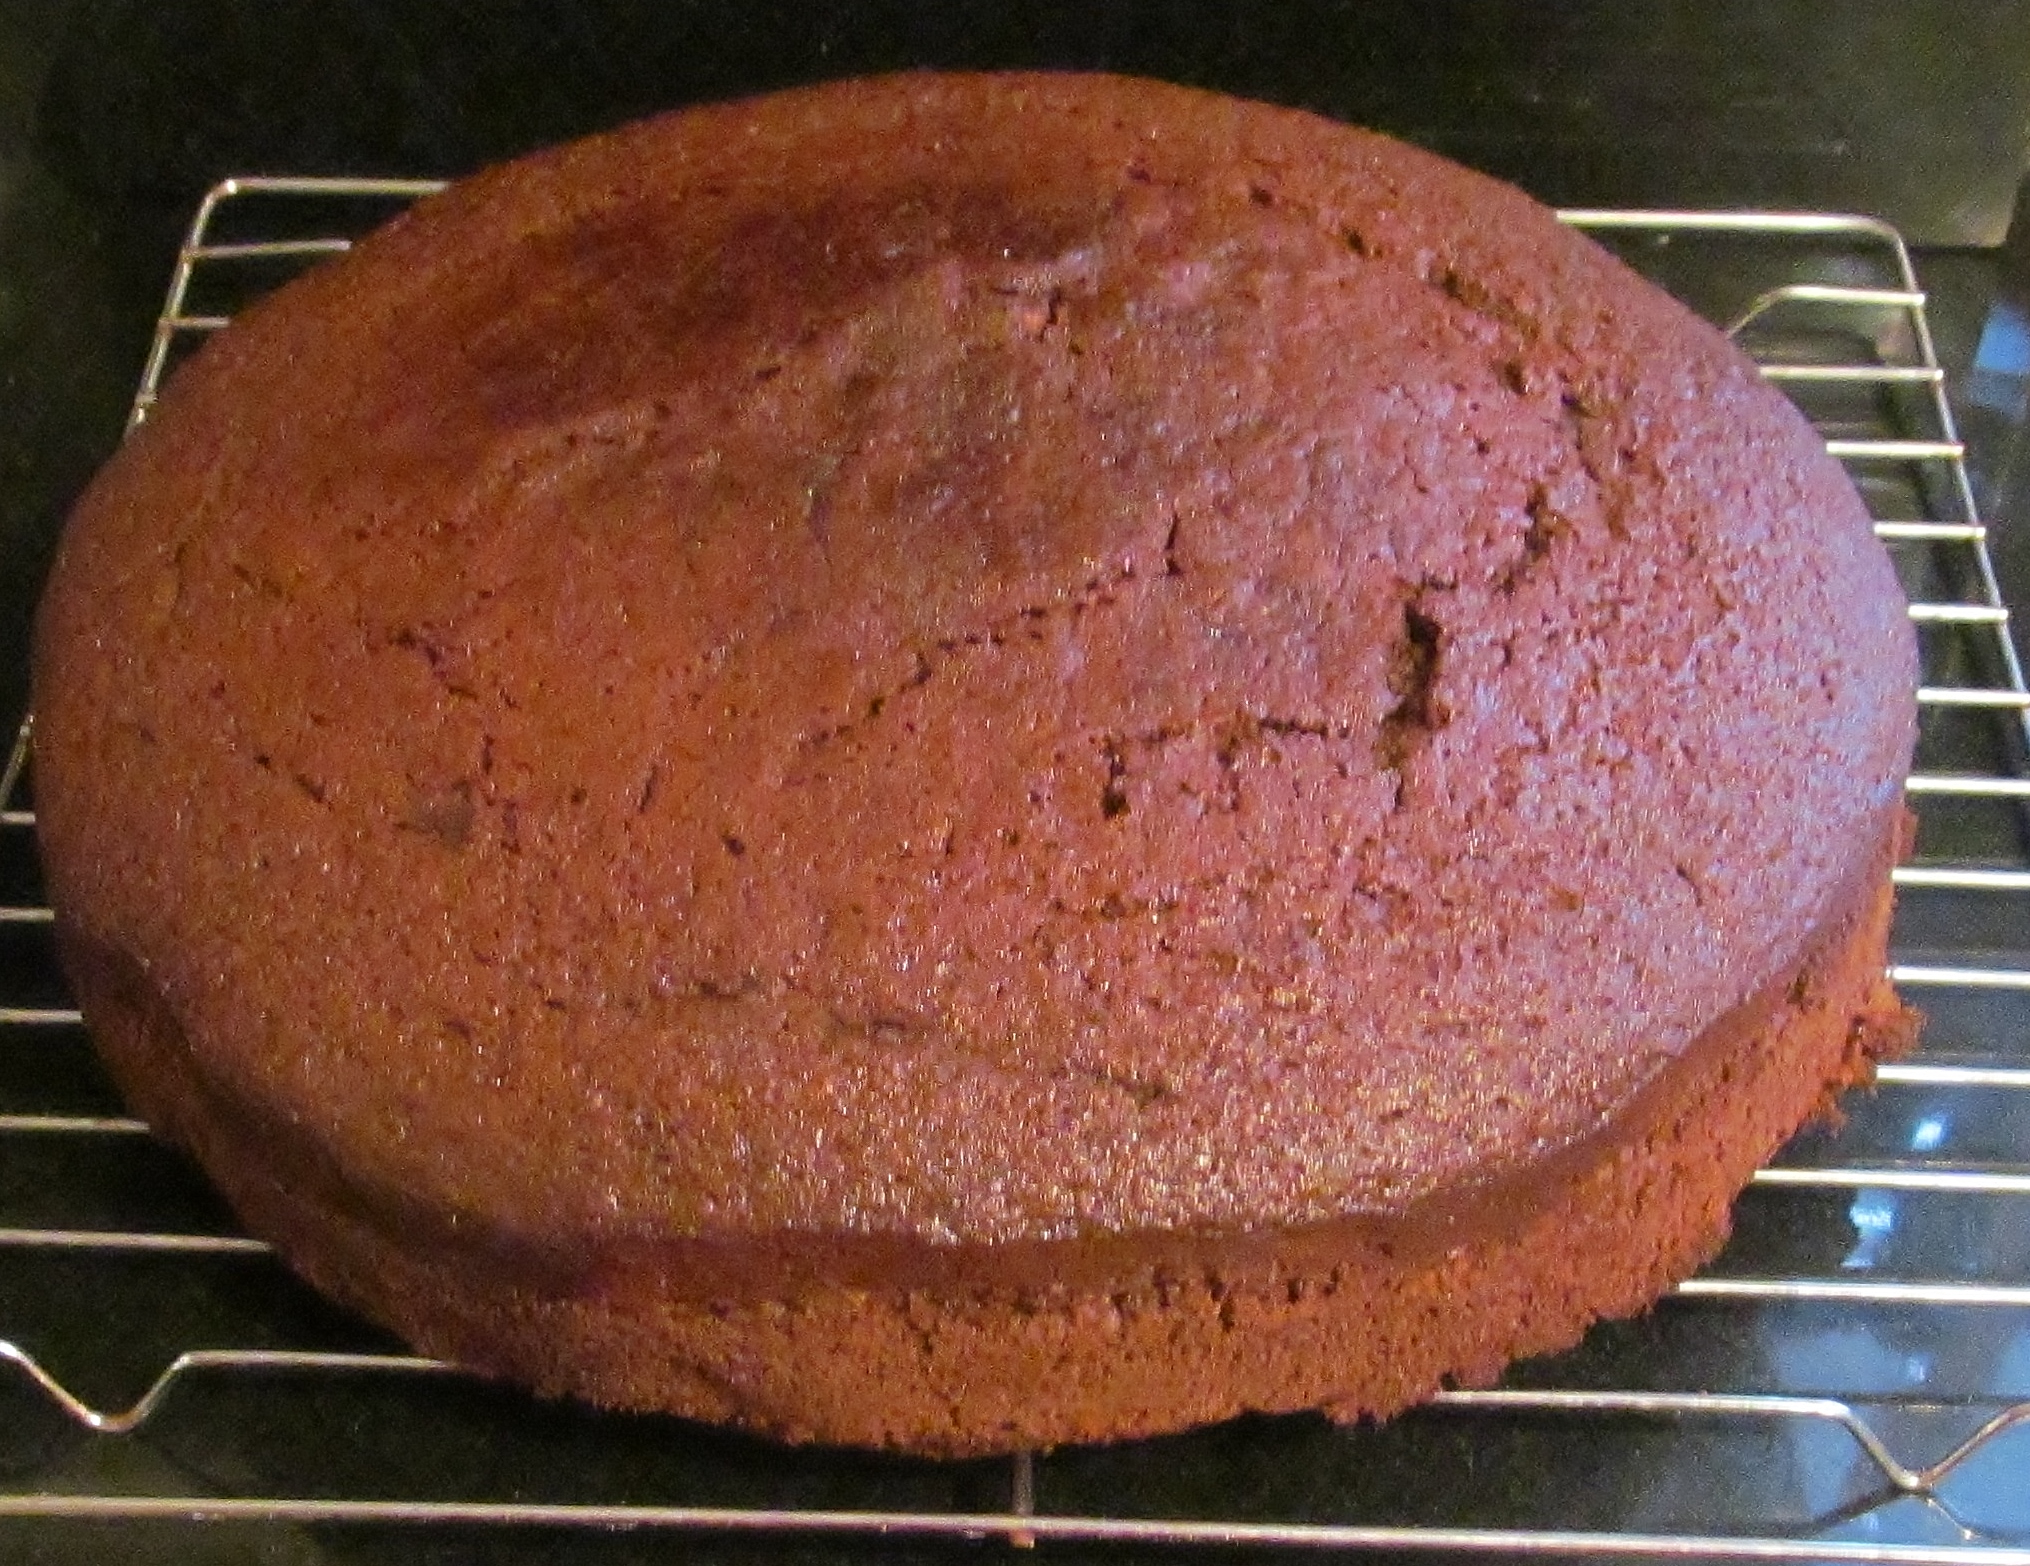
Week 112 and I delved into Mary Berry’s Baking Bible and found two recipes I fancied tackling last weekend. I like a pudding after dinner but try not to indulge too much! I began with Mary Berry’s sticky ginger and orange cake. I wanted a cake I could put under my cake dome and tuck into with a cup of tea when I get home from work!

Mary Berry's Sticky Ginger & Orange Cake

Mary tells you to put the black syrup, the golden syrup and some water into a saucepan and bring to the boil. Meanwhile measure out all the other ingredients into a bowl and mix. Then add the syrup mix, continue to stir and then pour into the prepared, lined cake tin and bake for about 50 minutes.  The resulting cake looked and smelt amazing. Mary advises that you wrap the cooled cake in foil and store for a day or two before icing ( if you want to ice it) . I did that then used the juice from a blood orange with some icing sugar and iced the cake.

Kim's sticky ginger & orange cake

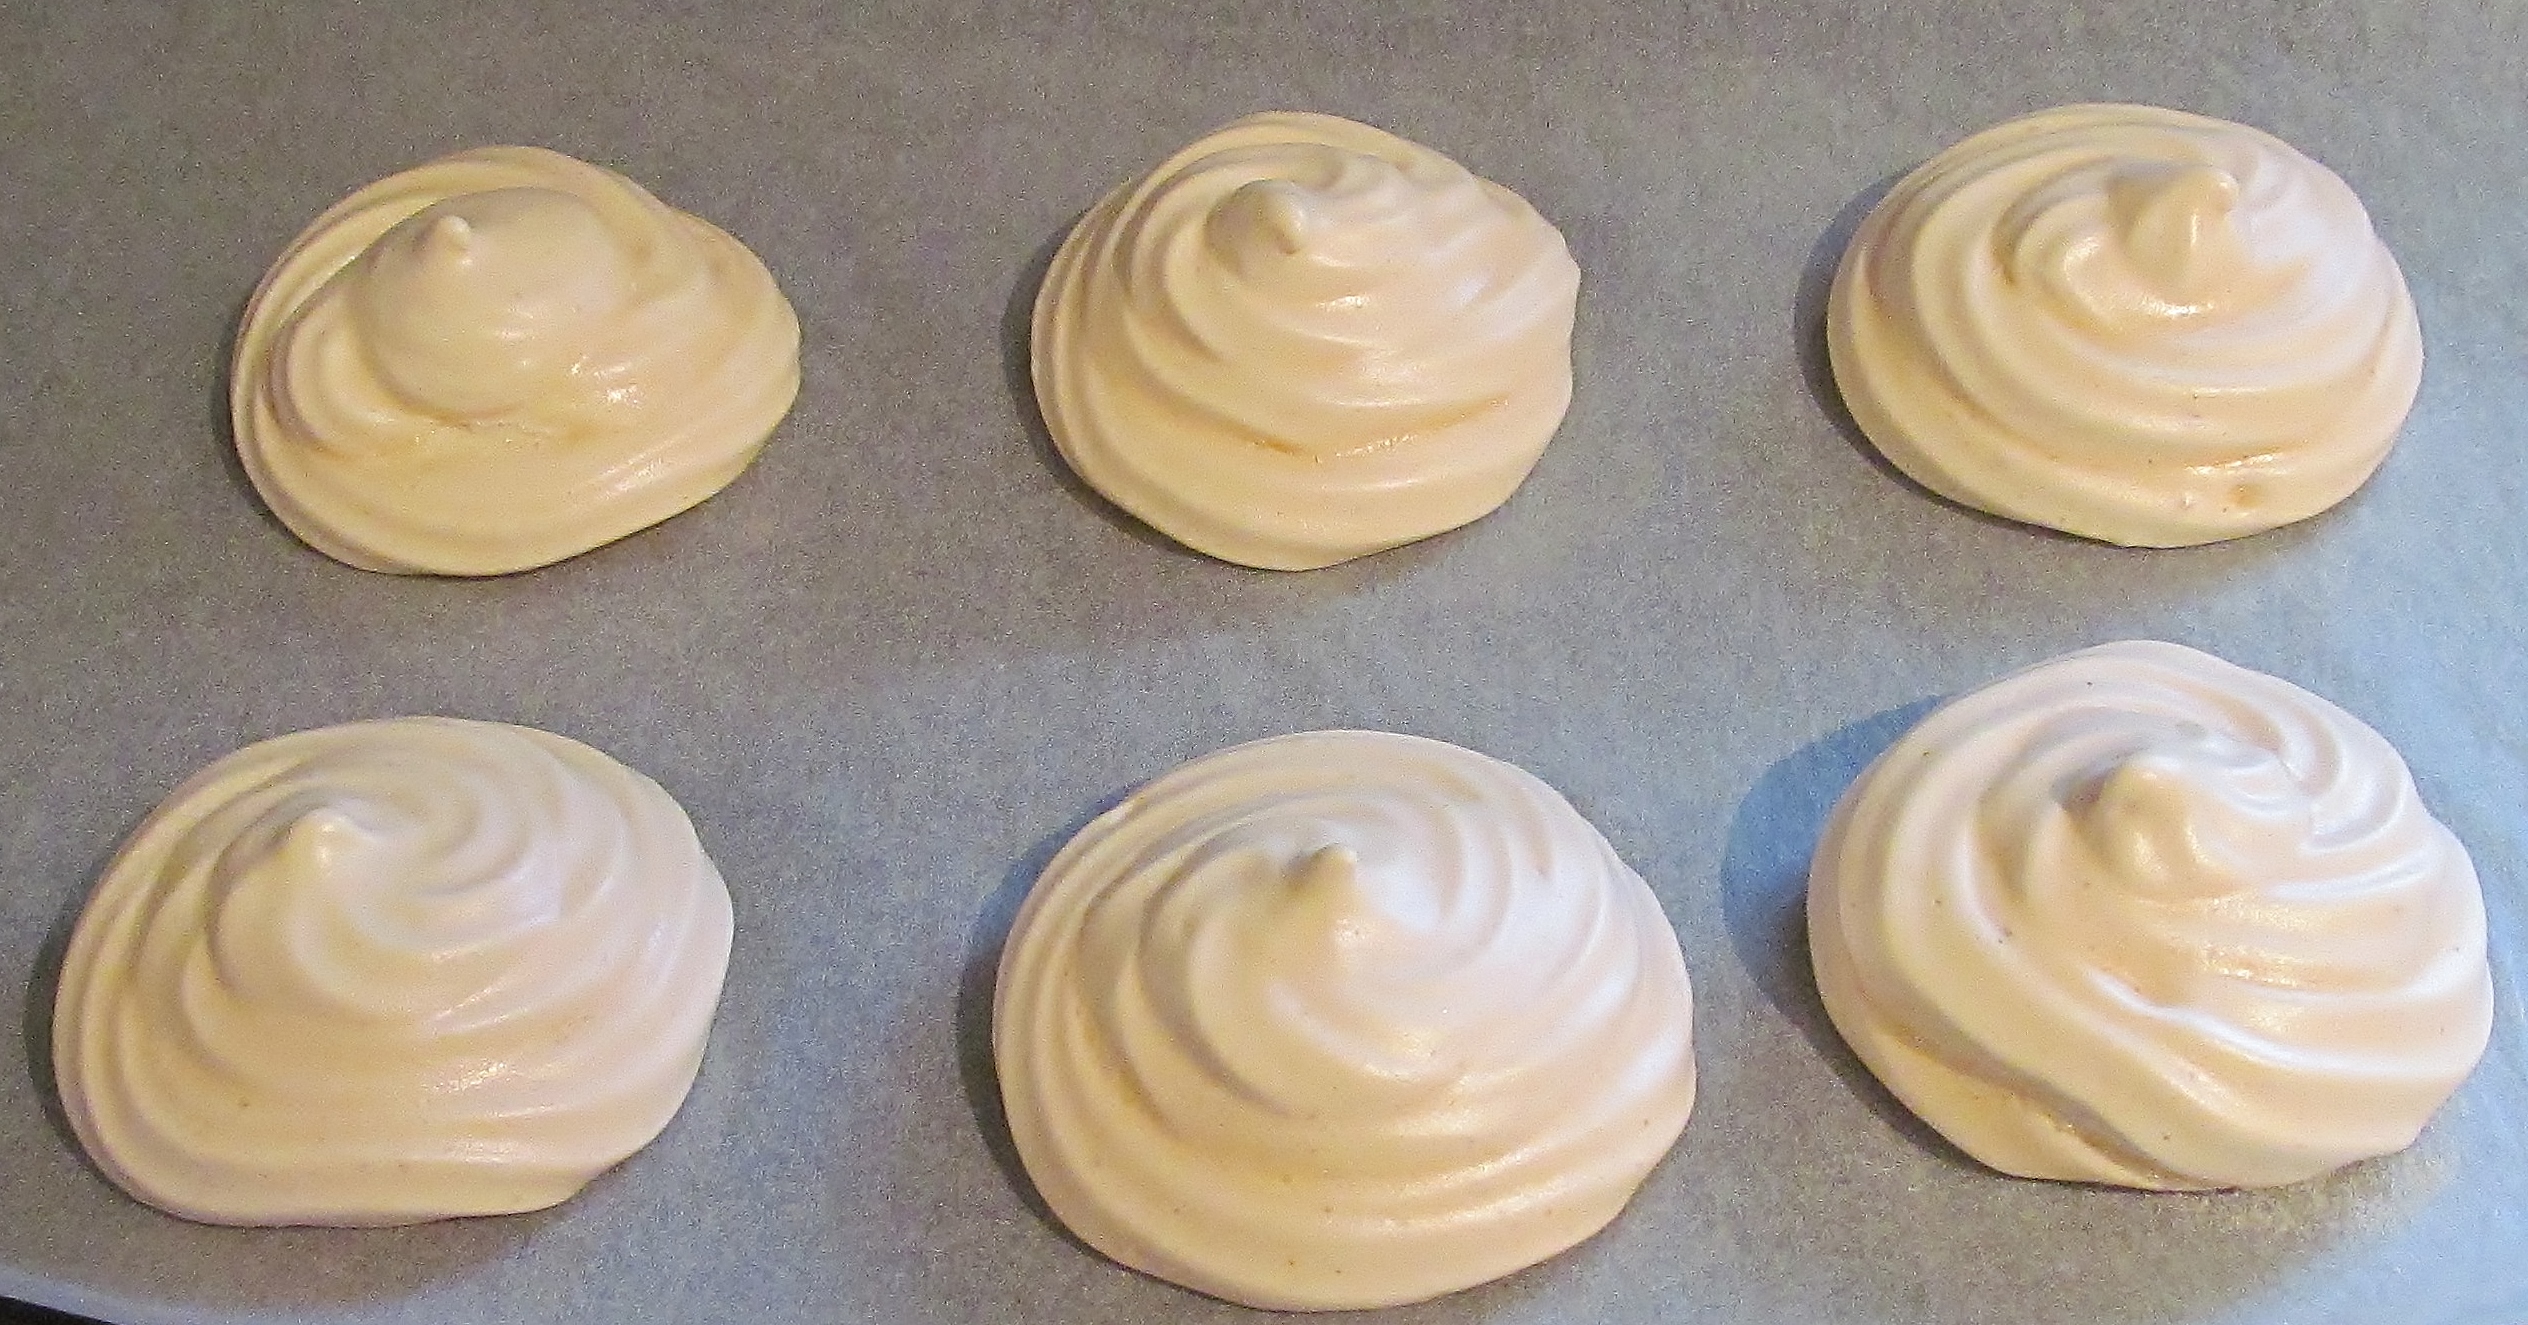
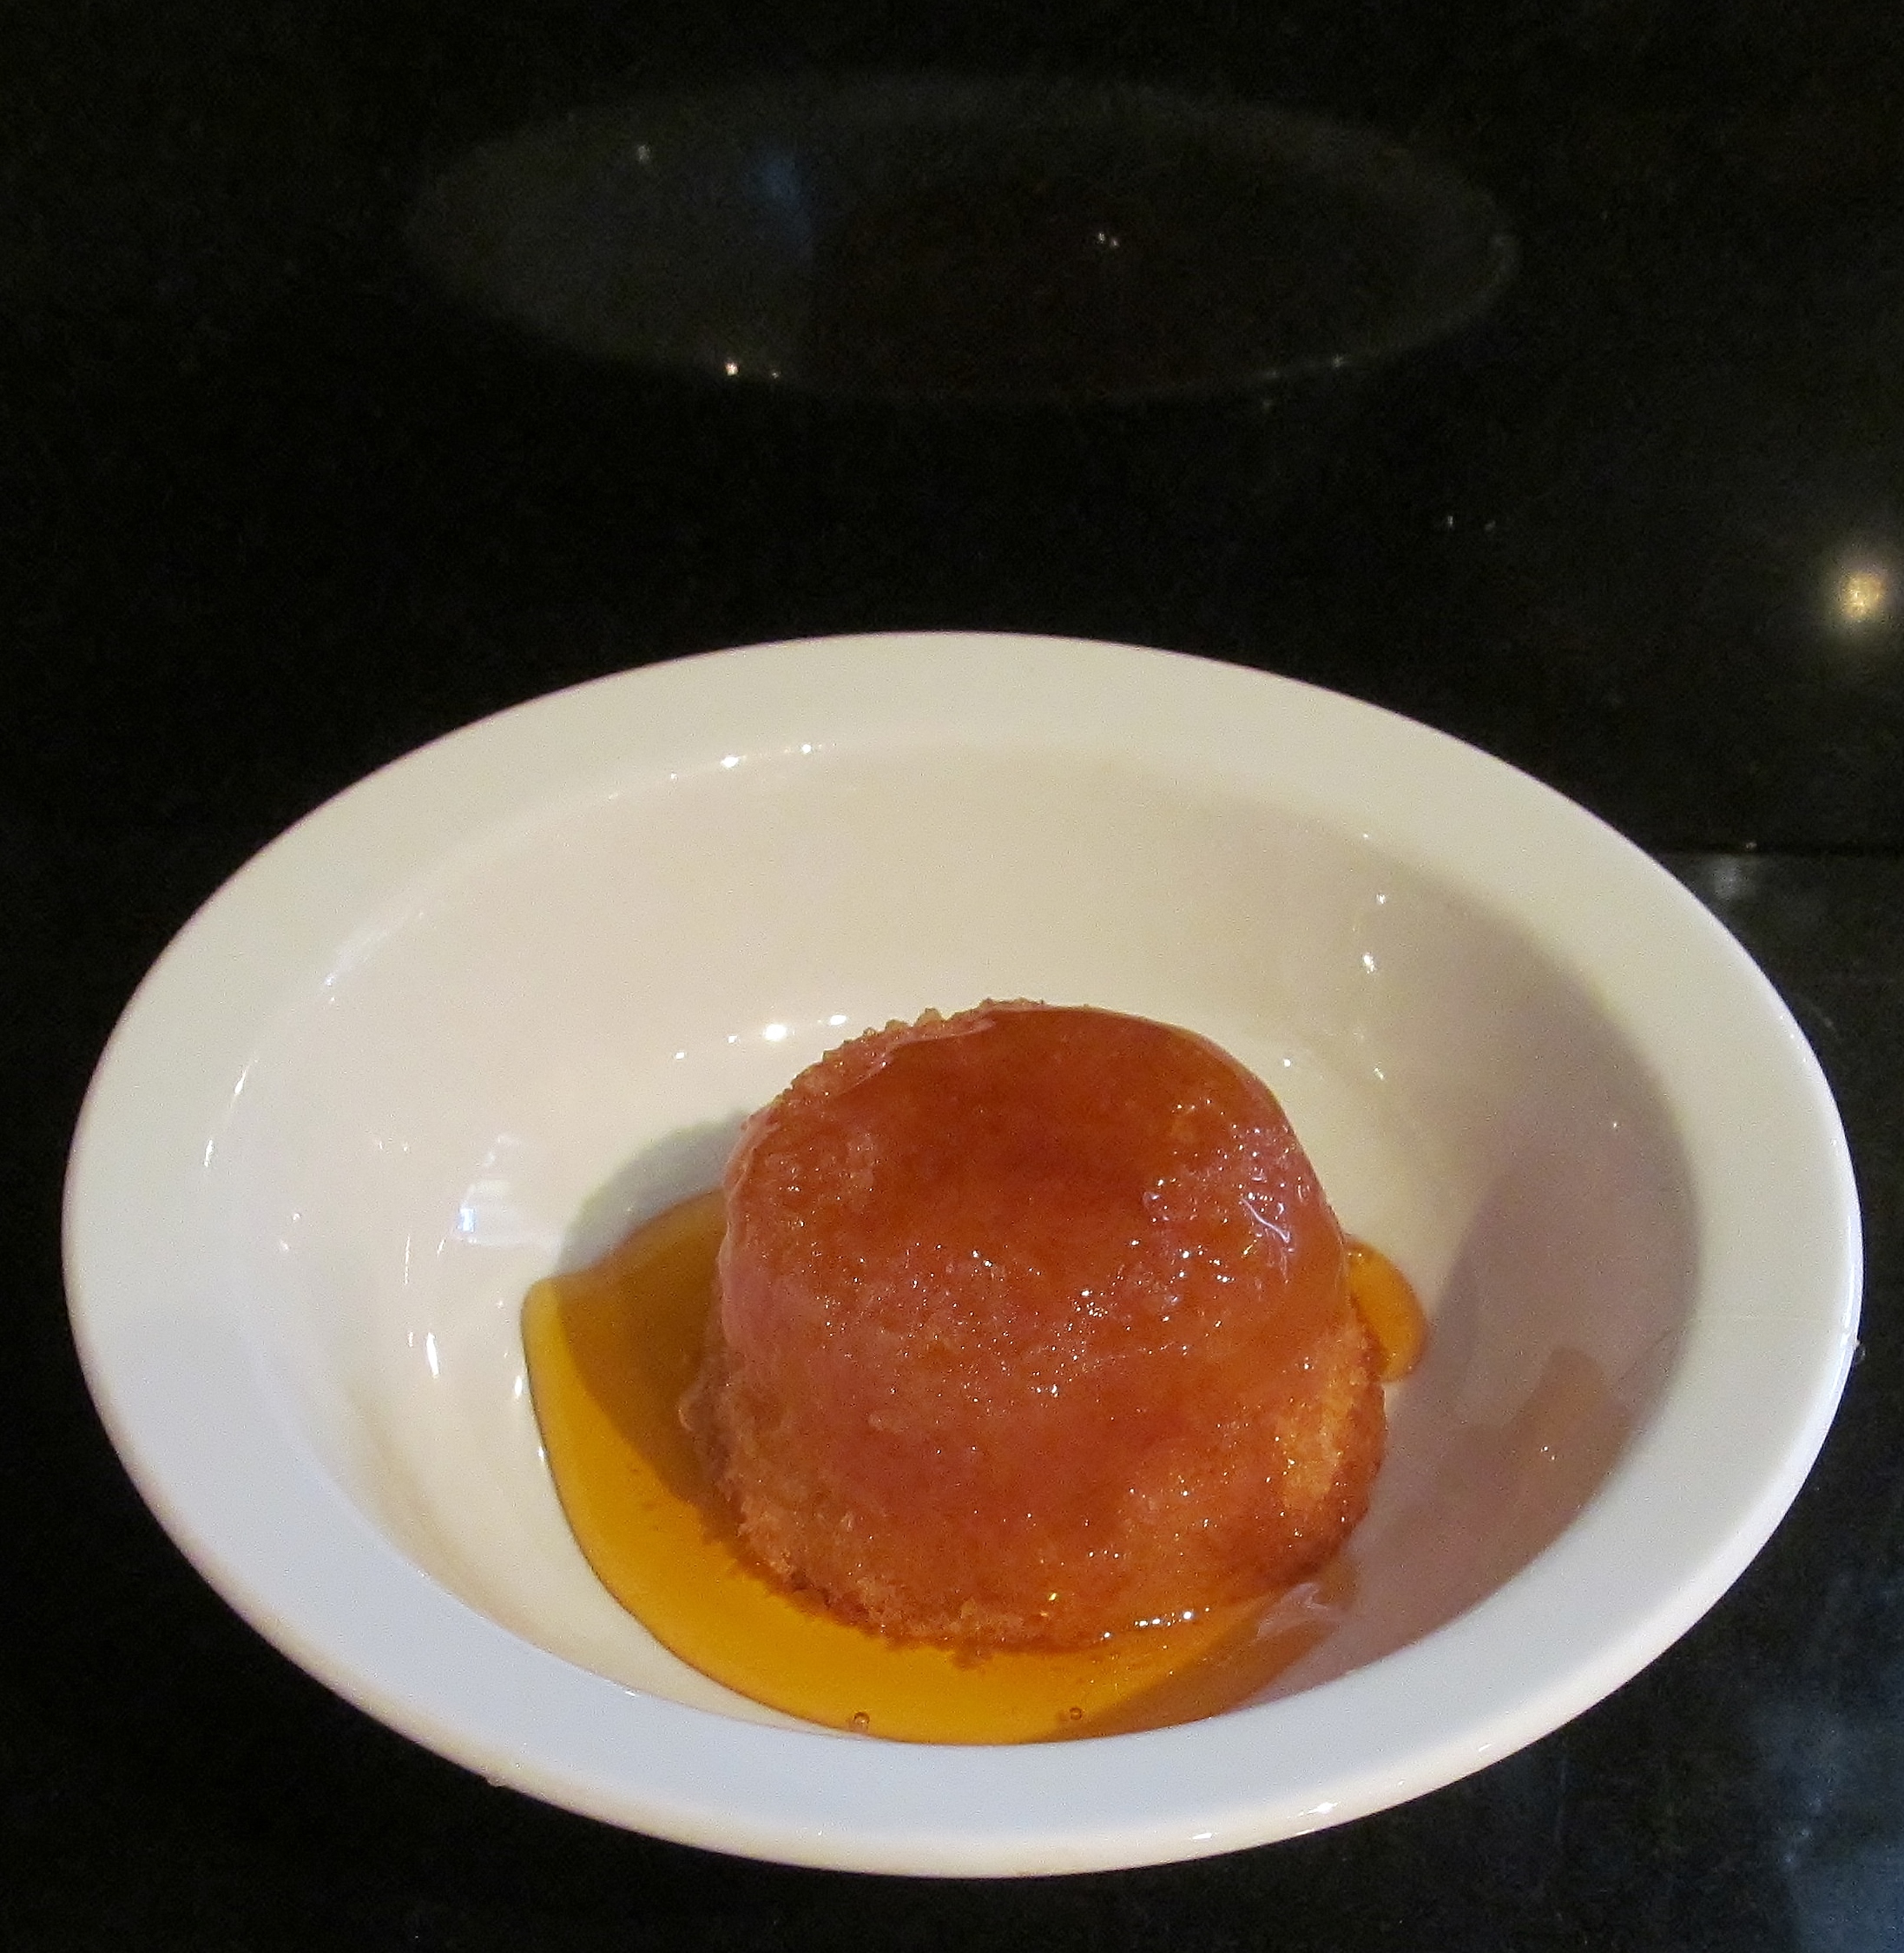
The second recipe was the treacle sponges. Mary asks you to mix about 8 table spoons of golden syrup with a tablespoon of lemon juice and then divide between the pudding cases. I brought some disposable foil pudding cases for this as I had no pudding bowls.

Mary Berry's Treacle Puddings

Mary then asks you to mix the rest of the ingredients together- I just love these kind of recipes- thanks you Mary! Then divide this mix between the cases and smooth the tops. Mary then asks you to cover the top with grease proof paper and foil cover and then steam. I considered using a large pan but then realised I had a steamer in the cupboard that I hadn’t used for ages so I dug it out and put three puddings in the 1st level, and 3 in the second. I filled it up, set the timer and left it to cook. The resulting puddings came out really well and I would definitely do them again..

Kim's treacle pudding

The chief taster has been feeling a bit left out lately with the bakes and sent me a text message with a picture of his lonely empty cake dome…..so he now has half a sticky ginger and orange cake in it!

Chief Taster's Cake Dome

I am still watching the Comic Relief Great British Bake Off, you can see episode 3 here. David Mitchell is hilarious , Michael Sheen seems really down to earth and funny and this is really worth watching. If you haven’t donated or organised some kind of fun bake sale already, please consider it- it’s a great cause.

The countdown continues and there are now 49 recipes left to go…gulp! The end is now very much in sight!

49 recipes left to go!

Week One Hundred & Nine – Mary Berry’s Courgette Loaf & Creme Brulee

Week 109 and I am back in the baking saddle but not so much with the sitting and putting the fingers to the keyboard- oh well. i delved into Mary Berry‘s Baking Bible and it was quite apparent this week that there are not so many recipes left now to do and I am going to have to make a lot of celebration type cakes this year so watch out for- Happy Sunday cakes or Happy Weekly Shop Cakes or just Happy it’s one of the only recipes left cakes!


Mary Berry's courgette loaves

Anyhow, I found this unusual recipe not yet done- Mary Berry’s courgette loaves. The recipe makes 2 loaves- quite handy for the chief taster! This recipe involved grating loads of courgette- my machine featured last week came in very handy for this. This is one of Mary’s throw all the ingredients in and mix, then divide between 2 lined loaf tins and bake. The mixture looked ” different” and a bit yuk to be honest

Kims courgette loaf mix

The finished loaf looked fab and it didn’t look like a veggie loaf!

Kim's courgette loaf

Mary suggests you put one in the fridge and one in the freezer- we put one in the fridge and one in the chief taster!

funny

The second recipe was Mary’s creme brulee. This involved numerous egg yolks , and almost bucket loads of single and double cream- oh and sugar and vanilla extract- so really healthy for you! Mary asks you to whisk the egg yolks with the sugar and vanilla, then heat the cream until it is just too hot to stick your finger in- I took her word for this, I didn’t fancy a burnt finger! Then allow the cream to cool slightly and whisk all the ingredients together. Mary then asks you to either pour this into a large bowl or some ramekin dishes and then stand in a roasting tin, fill up halfway with hot water and cook in the oven until set. Once cooked, put in the fridge over night.

Mary Berry's creme brulee

The next day, pour some demerara sugar on the top of each one and either place them under the grill or use a cook blowtorch on the top. I just so happened to get a blowtorch for Christmas, thanks to my other mum who probably got fed up with me borrowing hers. It was great fun!

blowtorch

Once the sugar had been caramelised on the top of the brulees, Mary asks you to put them back in the fridge again overnight and then enjoy. I made 8 in ramekin dishes and we gave 4 to the chief tester- and he and my other mum tucked into 2 each back to back- and so did we!

Kim's creme brulee

Naughty but nice!

naughty but nice


Week One Hundred & Eight – Mary Berry’s Cheese & Celery Crown Loaf & Basic White Meringues

Week 108 and I am on track this week with my blog- for a change! This week I delved into Mary Berry‘s Baking Bible with more enthusiasm and found the cheese and celery crown loaf recipe and the basic white meringues. My goal this week was being able to use what ever kitchen gadgets I have to help with my sore hand.

Mary Berry's Cheese & Celery Crown Loaf

I began with Mary Berry’s cheese & celery crown loaf and got out a large bowl. I mixed the flour and the butter together with my hand mixer. I added the pepper, the chopped celery and the garlic from my garlic roller.

Kim's garlic roller

I then added the cheese from my electric grater! I stirred these together and then added the milk and the beaten egg. I added the dough hooks to my mixer and mixed it until I had a lovely dough mix.

cheats grating

Mary suggests you either knead the dough lightly into a neat round and put on a baking tray or divide the dough into 12 pieces and roll each piece into a ball. Place the balls into a greased cake tin , sprinkle with grated cheese and bake for about 40 minutes.

Prepared cake tin

This worked well for me and the finished crown loaf looked good and smelt amazing. I have managed to make a loaf without hurting my hand and this week my hand has been recovering in this brace which keeps it still so that the ligaments can heal with the occasional break for some physio so that I retain full movement.

Kim's sore hand

The second recipe was Mary Berry’s basic white meringues. I had to find some recipes this week that hubby could also eat- he had minor surgery in his mouth on his jaw and has had a liquid diet for a while. I thought the meringues with some ice cream might tempt him!

This recipe needed 3 egg whites so i used my egg separator to do this and save my hand and then my hand mixer to beat the egg white until thick and glossy.

Kim's egg separator

I then added the sugar , a little at a time , continuing to beat with the mixer until all the sugar was in. Mary then asks you to add the mix into an icing bag.One tip I have found really useful is to buy disposable icing bags, really easy to find now.

Kim's disposable icing bags

I then use a large glass to hold the bag open so that you can put the mixture into the bag really easily.

Kim's icing bag holder

I then piped small rounds as per Mary’s instructions and put the meringues in to bake for about 1 1/2 hours. I then left the oven door open while turning the oven off to allow the meringues to cool.

Kim's meringues

Hubby has yet to sample the meringues but hopefully they will be tasty with some ice cream. Hope you feel better soon hubby. xx

get well


The countdown continues and now there are 56 recipes left to go…..


Week One Hundred & Seven-Mary Berry’s Nusskuchen & Jumbles

Week 107 and yes- I know- I am late again with the blog but today I am doing both last week’s and this weeks so will catch up so you get two for one today! I will get into the swing of this blogging again! I delved into Mary Berry’s Baking Bible looking for a birthday cake for my chief taster ( dad-in-law) and saw the Nusskuchen which is a german nut cake-perfect! The other recipe I found was Mary’s jumble biscuits.

Mary Berry's Nusskuchen

I started with the Nussskuchen cake which was quite a fiddly sponge. I had to roast the hazelnuts to remove the skins and then crush them to add to the sponge which had various stages to it. I roasted the hazelnuts and then followed Mary’s instructions to roll them together in a tea towel to remove the skins. What I hadn’t mentioned was that just before Christmas while walking my hairy hoolies on a street walk, my big lad suddenly ran across in front of me and I fell- the classic fall onto both knees and both hands and grazed my nose. I dented my ego , skinned my knees and had sore hands but picked my self up and finished the walk.

dog walking


I didn’t realise how much i had hurt myself until a week or two later when i was struggling to hold things in my right hand and it really hurt when  I rotated the wrist. I had it x-rayed but no break thank goodness but strained or pulled ligaments and advised to keep the thumb/wrist strapped to help it heal. This has proved to be good except for baking and removing the skins from the hazelnuts really hurt! Mary asks you to beat the sugar and butter together, beat in the egg yolks and stir in the crushed hazelnuts. Mary then asks you to dissolve a spoonful of coffee in some warm milk and add it to the mix, then fold in the flour. Mary then asks you to whisk the egg whites in a separate bowl until light and fluffy then fold this into the other mix.  Put this mix into a 20cm tin and bake.

What Mary then says is that while this cake is baking, prepare the filling. Peel , core and slice some baking apples and put them in a pan with some apricot jam, lemon juice an rind and cook slowly until the apples are soft but retain their shape. Leave to cool. At this point, all was ok and I was on track. I took the sponge out of the oven and took it out of the tin. At this point I realised I had a problem. Mary asks you to cut the sponge in half. I want to know how I can do this with such a thin sponge so i did the only thing I could think of, I made another sponge- and yes, I  had to roast more hazelnuts and then remove their skins- OUCH!!! the things I do for love!

Kim's Nusskuchen sponges


sore hand

Finally I had 2 sponges, I added the apple and some cream to the middle and melted some chocolate for the topping with some chocolate buttons to make it a birthday cake.PHEW!

Kim's Nusskuchen cake

The second recipe was Mary Berry’s jumbles biscuits. This was an easy dough to make, one of Mary’s throw all the ingredients in a bowl and mix.

Mary Berry's Jumbles

Mary then asks you to divide the dough into 32 pieces.  As my hand was sore, i divided mine into 16 and made my biscuits a little larger. Mary suggests making the biscuits into the shape of the letter S. I did play with the idea of making them into various initials but stuck with the S shapes as it was easiest on my poor hand.

Kim's jumbles

When you read the blog, it must seem like we lurch from one accident, incident or operation to the next- sometimes it does seem like that!

I

Week One Hundred & Six – Mary Berry’s Sticky Apricot Pudding

Week 106 and already I am behind with my blog, so much for New Year good intentions! As I have mentioned before, we still had a lot of goodies left over from Christmas and so when I dipped into Mary Berry‘s Baking Bible I went hunting for a pudding that could be eaten quickly and the sticky apricot pudding seemed to fit the bill. I had actually planned to make this before Christmas but I didn’t get around to it.

Mary Berry's Sticky Apricot Pudding

This recipe was a lovely one to begin the new year. It basically involved a cake mix which was a Mary special- throw all the ingredients together and mix, pour into a pudding tin and lay the apricots on top and then pour over the melted butter and then sprinkle demerara sugar over the top. Bake in the oven for about half an hour until , in Mary’s words it becomes caramelized and brown. Mary suggests you eat it while its still warm with either cream or custard. We had a slice on its own and it was delicious.

Kims sticky apricot pudding

Our hairy hoolie who gave us such stress with his unexpected torsion and emergency operation just before Christmas is well on the road to a full recovery. This was a massive relief to us, this photo below was when we had just collected him on Christmas Eve and he was still really sleepy from the anesthetic and the painkilling drugs but having him alive and back with us. was the best Christmas present we could have had!

poorly hairy hoolie

A few people have been asking for clearer pictures of the stable I made for my nativity characters, if you re-visit that blog entry, I have added some more photos for you that show more of the detail.

Week Sixty Three – Mary Berry’s Date & Cherry Butter Bars

After a few weeks of not baking for my challenge of baking every recipe in Mary Berry‘s Baking Bible, it felt a little strange to get her book out again and look for something easy to ease myself back into this. This recipe is one of her tray bakes and as I had cherries and dates left over from Christmas baking , it seemed like a good one to re start the challenge.

Mary Berry's Date & Cherry Butter Bars

Mary asks you to rub the butter into the flour to make breadcrumb like texture, then add the chopped cherries and dates, some caster sugar and an egg. Bring it all together into a dough like ball and press it into a tray bake tin. Place it in a pre warmed oven for about 10 minutes. After 10 minutes, mark it into bars with a sharp knife and return it to the oven for another 10 minutes or until the bars are a lovely golden colour. Score through the bars again and allow to cool in the tin.

Kim's Date & Cherry Butter Bars

Once cool, keep in an airtight tin.

A quick and easy to get me back in the Mary Berry challenge saddle!

Week six – Mary Berry’s “My Mother’s Bread and Butter Pudding”

Week six here already, I seem to have settled into this challenge lark and am gaining confidence in my cooking abilities too.

I now look forward to sitting with Mary Berry’s bible to choose the recipe I fancy tackling this week.


I had quite a lot of a tiger loaf left over this week that was not fresh enough for sandwiches but I didn’t want to waste it so the bread and butter pudding fitted the bill!

The last time I tasted this pudding was when my own mother made it so it also brought back childhood memories too.

The recipe was very easy to follow, and in no time at all the pudding had been put together, I took a little time to layer the bread and as it was a tiger loaf, the pieces of bread were not a uniform square that was easy to cut into sections. Once made, Mary recommended leaving it for an hour to stand before putting it in the oven for 40 minutes.

I had the time, so sat with a nice cup of tea and reminised with my mum on her memories of making bread and butter pudding. then the pudding went in , timer on and waited.

The finished result looked good to me and Mary says in her book that although it tastes good hot, that it is just as nice cold…..well, we dug into it while it was hot and I enjoyed it very much, I am actually beginning to enjoy my own cooking, something I don’t usually do.

The rest of it? Well hubby had some later in the day and his parents took some away today. The only thing I would do differently? My mum recommended serving it hot with clotted cream ice cream……..naughty but nice….and mum always knows best!

Week Four – Shortbread!

Week four and I decided to go with Mary Berry’s “The very best shortbreadrecipe. I already had a shortbread mould from Lakeland and thought that this would come in useful with this recipe.

The other retail therapy item I treated myself to was the perspex cookbook stand from Lakeland which is fast becoming my second home. Each week I was struggling to find space on a work surface to cook, weigh, roll out etc while keeping the recipe book at hand and relatively clean. This solved this issue, I can clearly see my book now and it keeps it nice and clean.

Lakeland perspex cookbook holder

I followed Mary’s recipe for her very best shortbread and got out my Lakeland mould and followed the instructions on that to prepare the mould. I carefully pressed the dough into every nook and cranny of the mould and put it in my pre-warmed oven. I checked it after the time Mary recommended and decided to give it about another 10-15 minutes. Then I took the mould out of the oven and left it to cool completely. It then said to “turn it out onto a rack and dust with castor sugar“- it didn’t say “how do you get the stupid shortbread out of the mould in the first place?” ! I used a knife around the edges, I turned it onto the rack and tapped the back of it. It just wasn’t shifting!

Eventually I resorted to chiseling it out and it still stuck!

Well, being ever resourceful, I decided to google this issue and came across a blog with the same issues as I was having with this mould. http://cakesbakesandcookies.com/tag/shortbread/

Lakeland also have some comments/feedback under their website for this item with the same issues. http://www.lakeland.co.uk/11537/Shortbread-Mould

I decided to call it a day, go and get some more ingredients to make this again. I decided to make 2 batches, one in a tin as per Mary’s recipe and one giving the dratted mould another go.

The mix went well for each batch. I pressed the shortbread into my tin and after oiling and then flouring the mould, I pressed the mix into the mould. I had taken on board the tips on the websites to turn the temperature down a little and cook it for longer and in the oven it went.

Lakeland recommended a lengthy bake, allowing to cook to the colour of toast. I set the time for 45 minutes, then after this had gone by, added another 15 minutes…..then another 15 minutes….and eventually decided that they were done.

I turned the tin shortbread out fairly quickly, dusted it with castor sugar and cut it into fingers. The mould I left to cool.

The shortbread fingers were golden in colour and the semolina in the recipe gave it a nice crunch.

Now to the mould quickly becoming my nemesis. I went around the edge with a knife and tipped it onto a tray no movement yet. I tapped it gently all over. Still no movement. I used a small meat hammer to tap it smartly and hey presto, it released onto the rack.

I was not impressed with the result, the thistle mould could barely be seen, despite carefully pressing it into the design. The colour was too golden and it was very crunchy!

Oh well , I have achieved my goal and the tin of shortbread I was happy with the results so task done, but I am going to have to read more into the solutions to my mould it will not beat me!!

Week One – The Coffee Victoria Sandwich Cake

Ok, here we go, week one and the challenge is on.

I made sure I got all the ingredients in and sat and read through the recipe. Mary Berry’s instructions are clear  and concise but with no fancy terms, she inspires confidence that i can do it…..

After a confidence bolstering cup of tea, I ventured into the kitchen and got out all the equipment I needed and all the ingredients.

Putting this cake mix together didn’t take long and to be honest, it felt like I was back at school in my home economics class. At the moment it didn’t feel so much of a challenge but a revision on what I already knew but I ploughed on regardless.

The mix done, I carefully divided it into the prepared tins,  put them in the pre-warmed oven, set the timer and it was time for that ever-so-english tradition of another cup of tea again.

“PING” went the timer and I approached the oven with trepidation.  How would they look?  Was it too soon?…..or too late to take them out? Had I been a bit too blasé in setting the timer and not checking every so often?

Phew- I wiped by brow with relief, they looked risen, brown and didn’t immediately subside when I looked at them, I removed them and set them aside to cool and then removed them faily easily from the tins onto the cooling rack.

I then set to making the coffee buttercream – I love making buttercream icing but the initial mixing always creates clouds of icing sugar which seem to settle on every surface nearby!

The final step, putting it all together, would it resemble in any way the picture on Mary Berry’s book? Well, not so pretty or precise but not bad for a first effort…..

Well,, I will leave that up to you, but week one’s challenge is under my belt, i will now spend the week browsing the challenge bible and deciding what week two will bring……

Kim