Week One hundred & Twenty Two – Mary Berry’s Lavender Biscuits & Sugared Pretzels

Week 122 and the usual dip into Mary Berry‘s Baking Bible is getting a little restrictive because I am on the “home straight” and have so many recipes already under my belt! After the glutony of the chocolate fest cakes, I chose two of the biscuit recipes that I had yet to do.

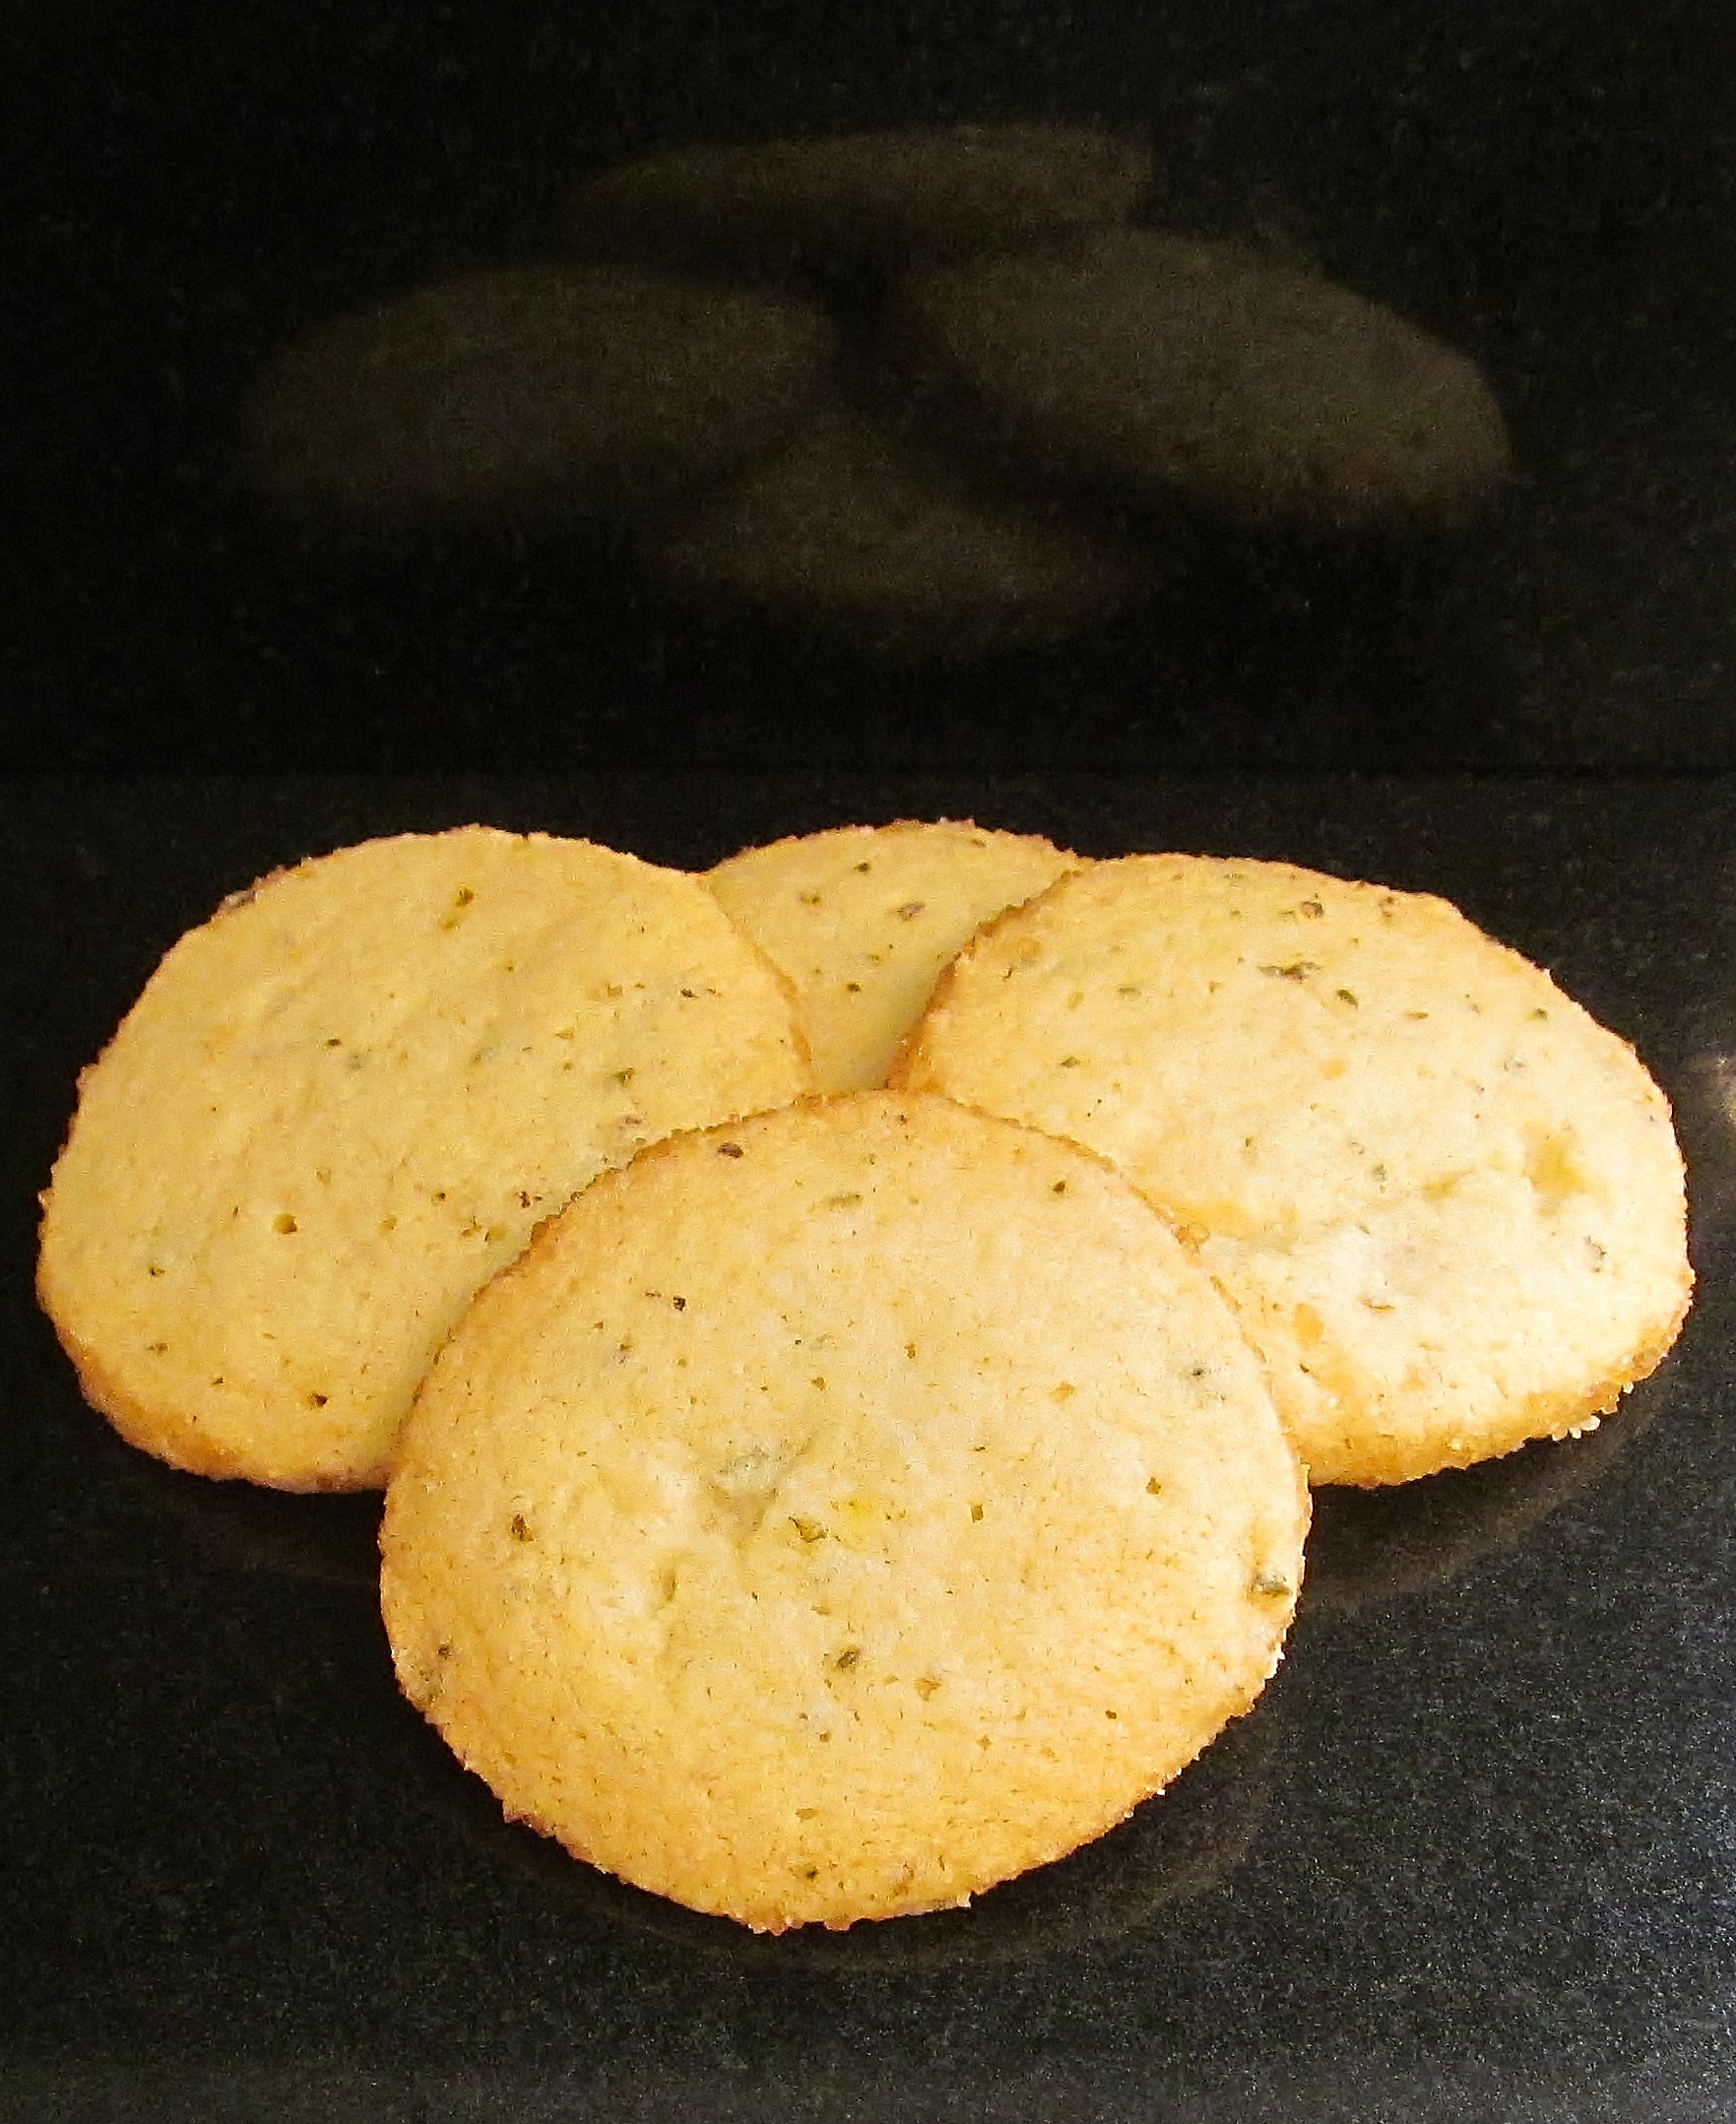
I started with the lavender biscuits. I had fancied doing these biscuits for a while but wanted to use fresh lavender. I had brought a small plant several weeks ago but it had not done much so one of my chief tasters kindly went and brought two plants with flowers just emerging so I could make these biscuits and I have some extra plants for the garden to boot! I followed Mary’s instructions carefully and mixed the butter and the lavender together and then added the other ingredients to form a smooth dough – this wasn’t as easy as it sounds!  Mary then asks you to divide the dough in to two halves, roll them out to form 2 sausage shapes, roll these in the sugar, wrap in baking parchment and chill until firm – this took quite a while. Once firmed, cut each roll of dough into about 10 slices and bake them.Mary Berry's Lavender Biscuits

After about 15-20 minutes, the biscuits were done. They looked unusual and the lavender had a subtle aroma. They tasted lovely too but I am not sure about “eating” lavender!

Kim's lavender biscuits

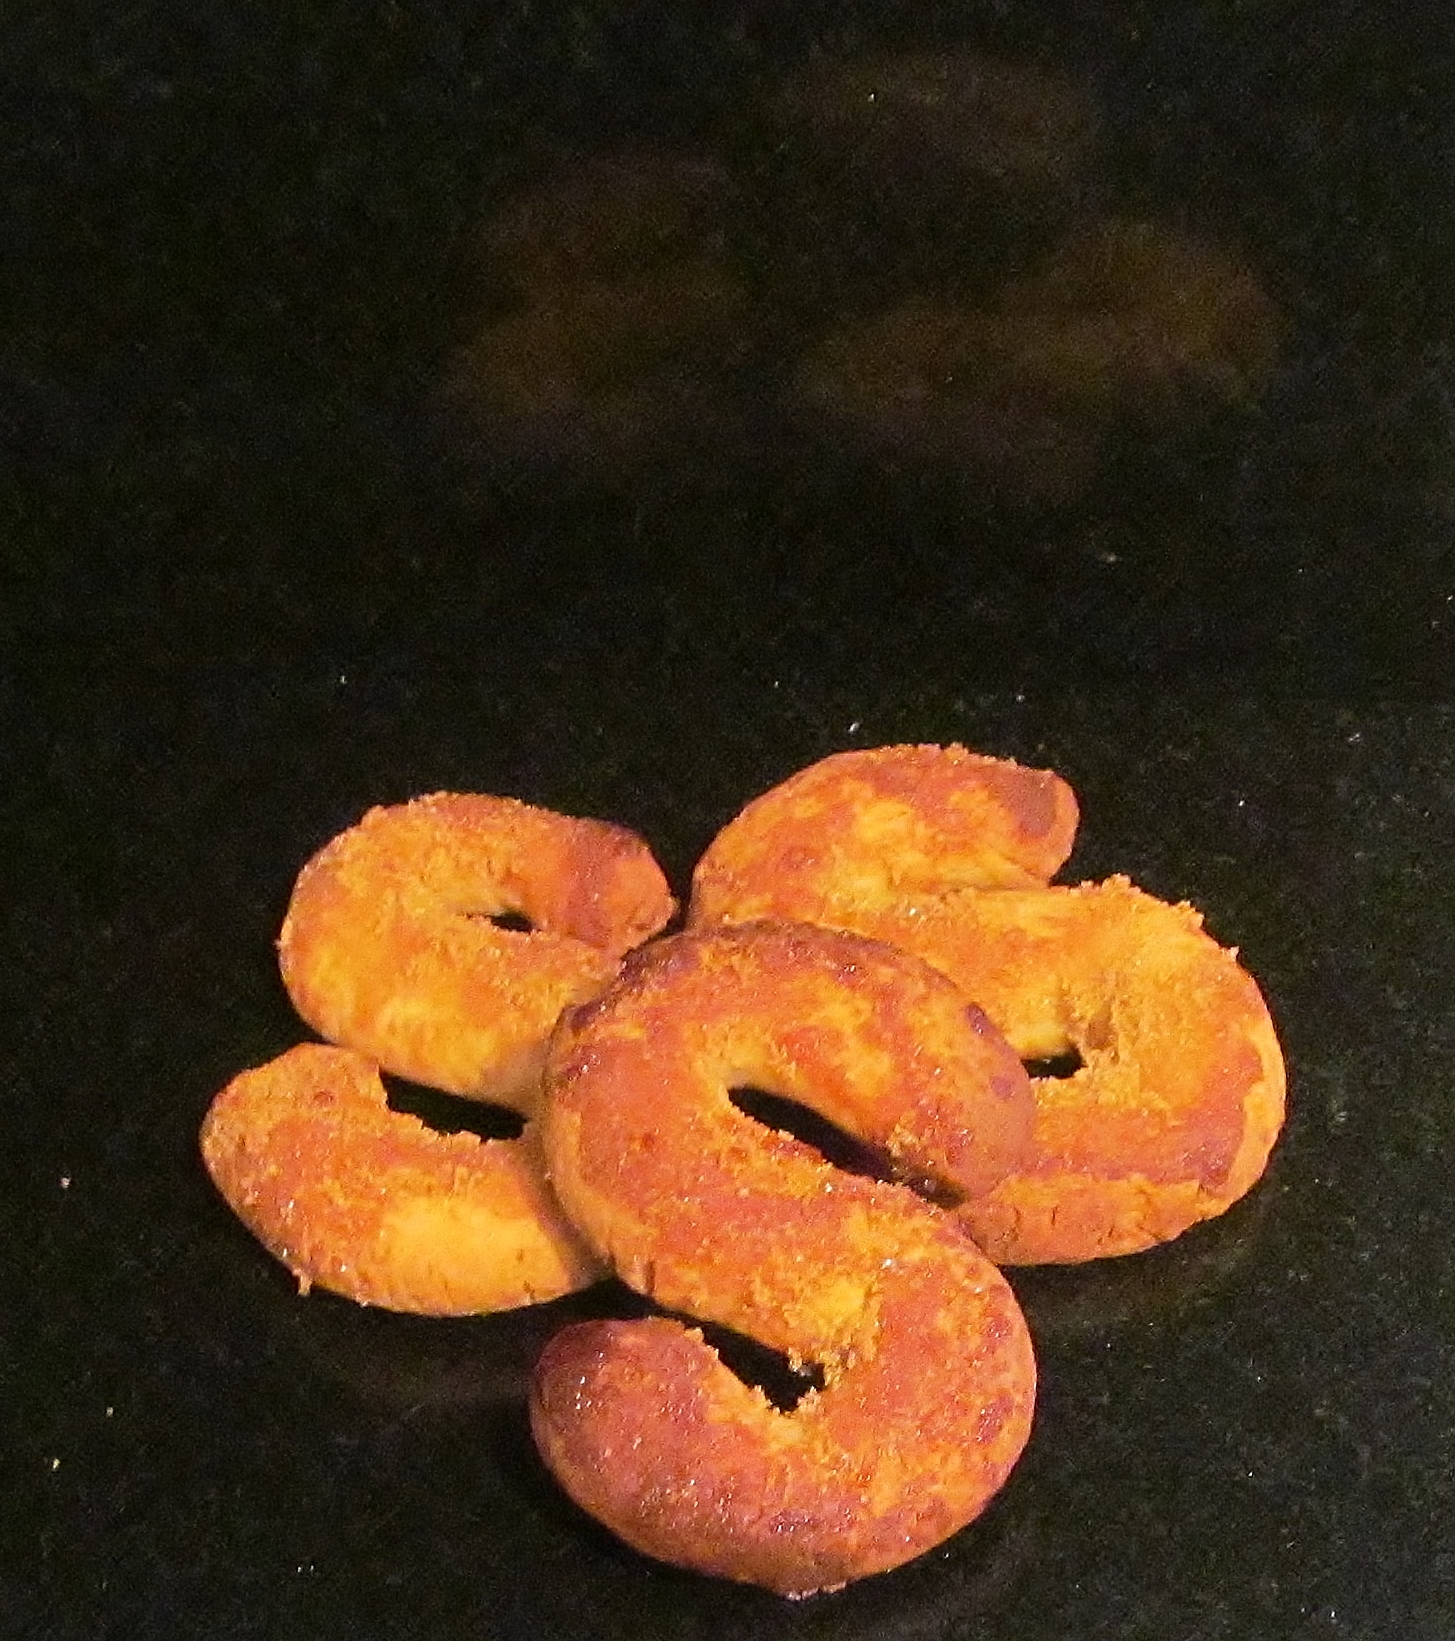
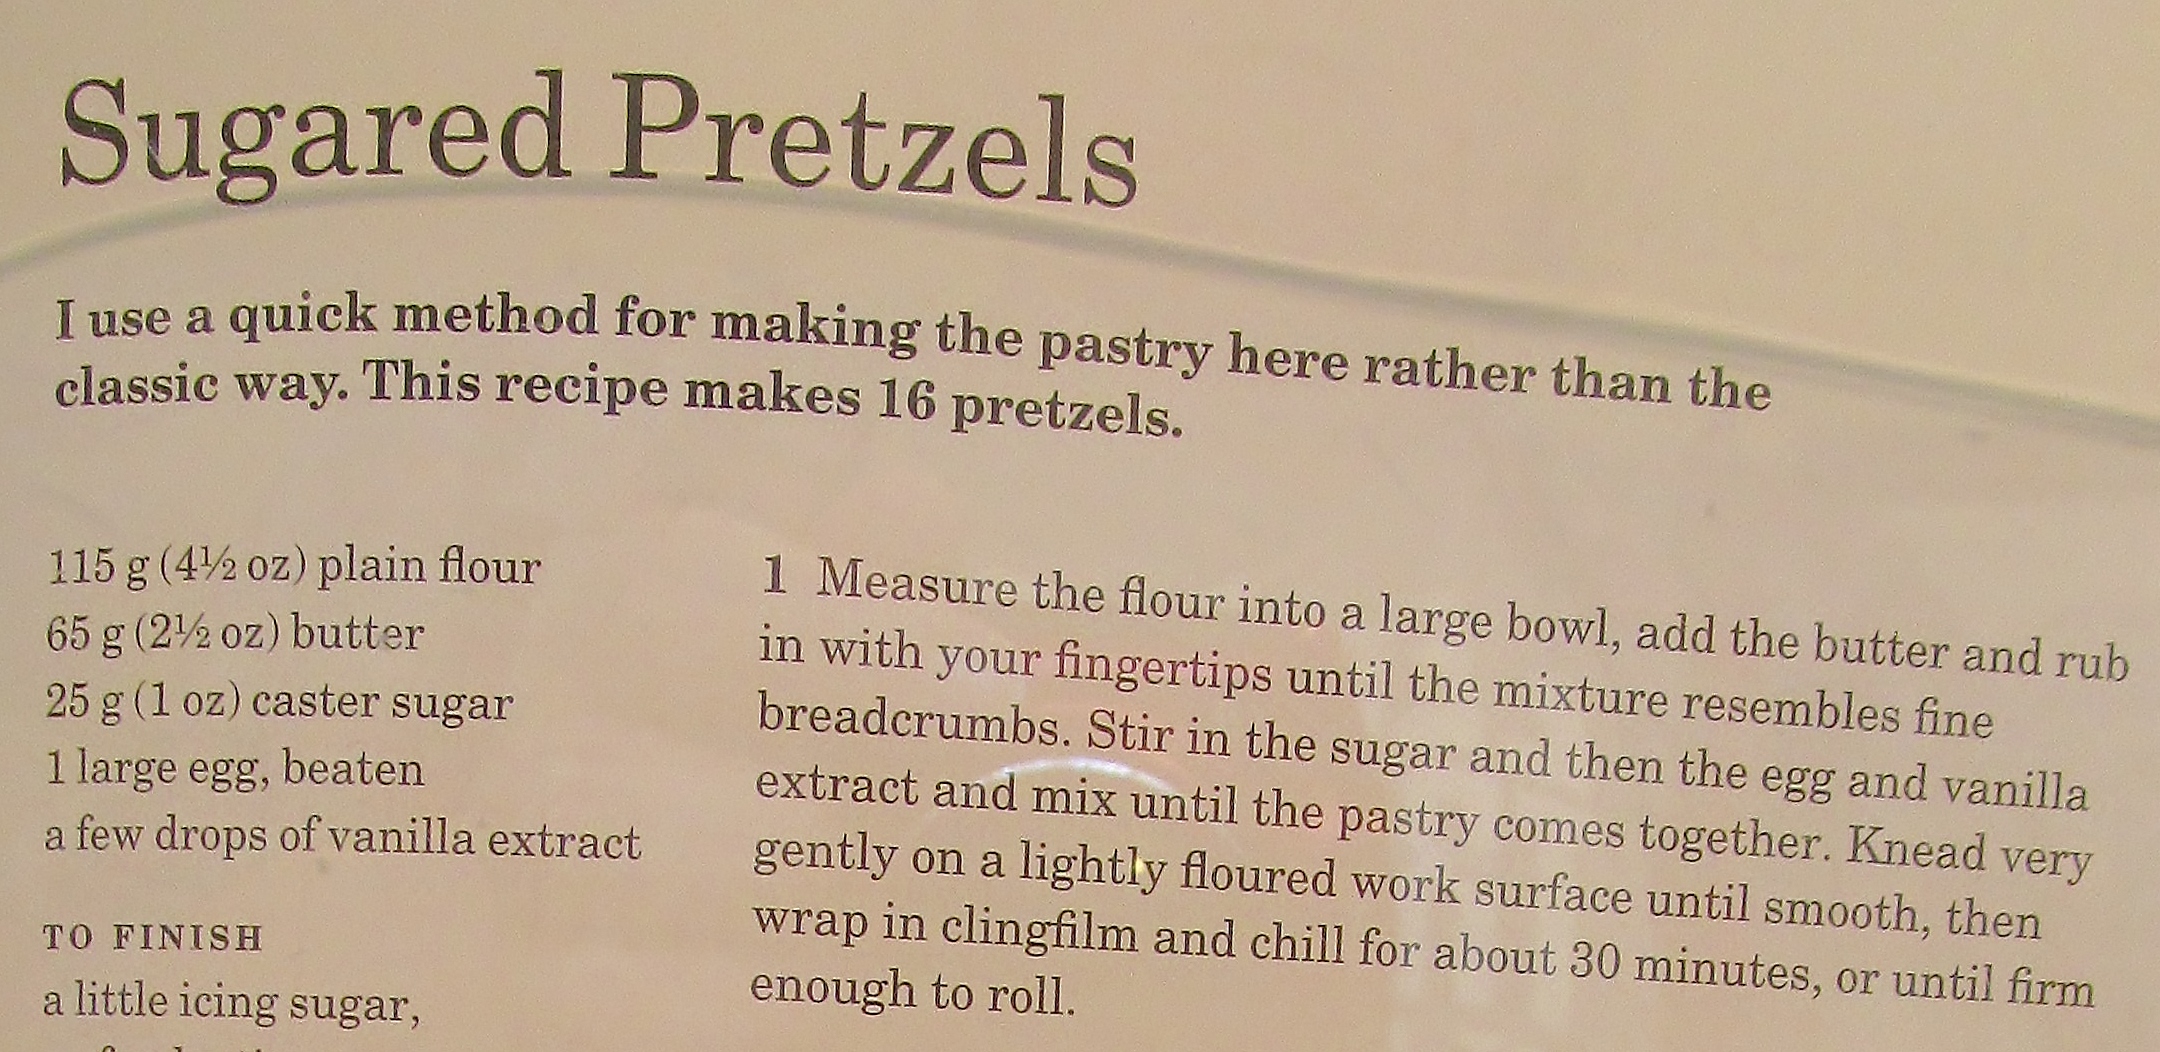
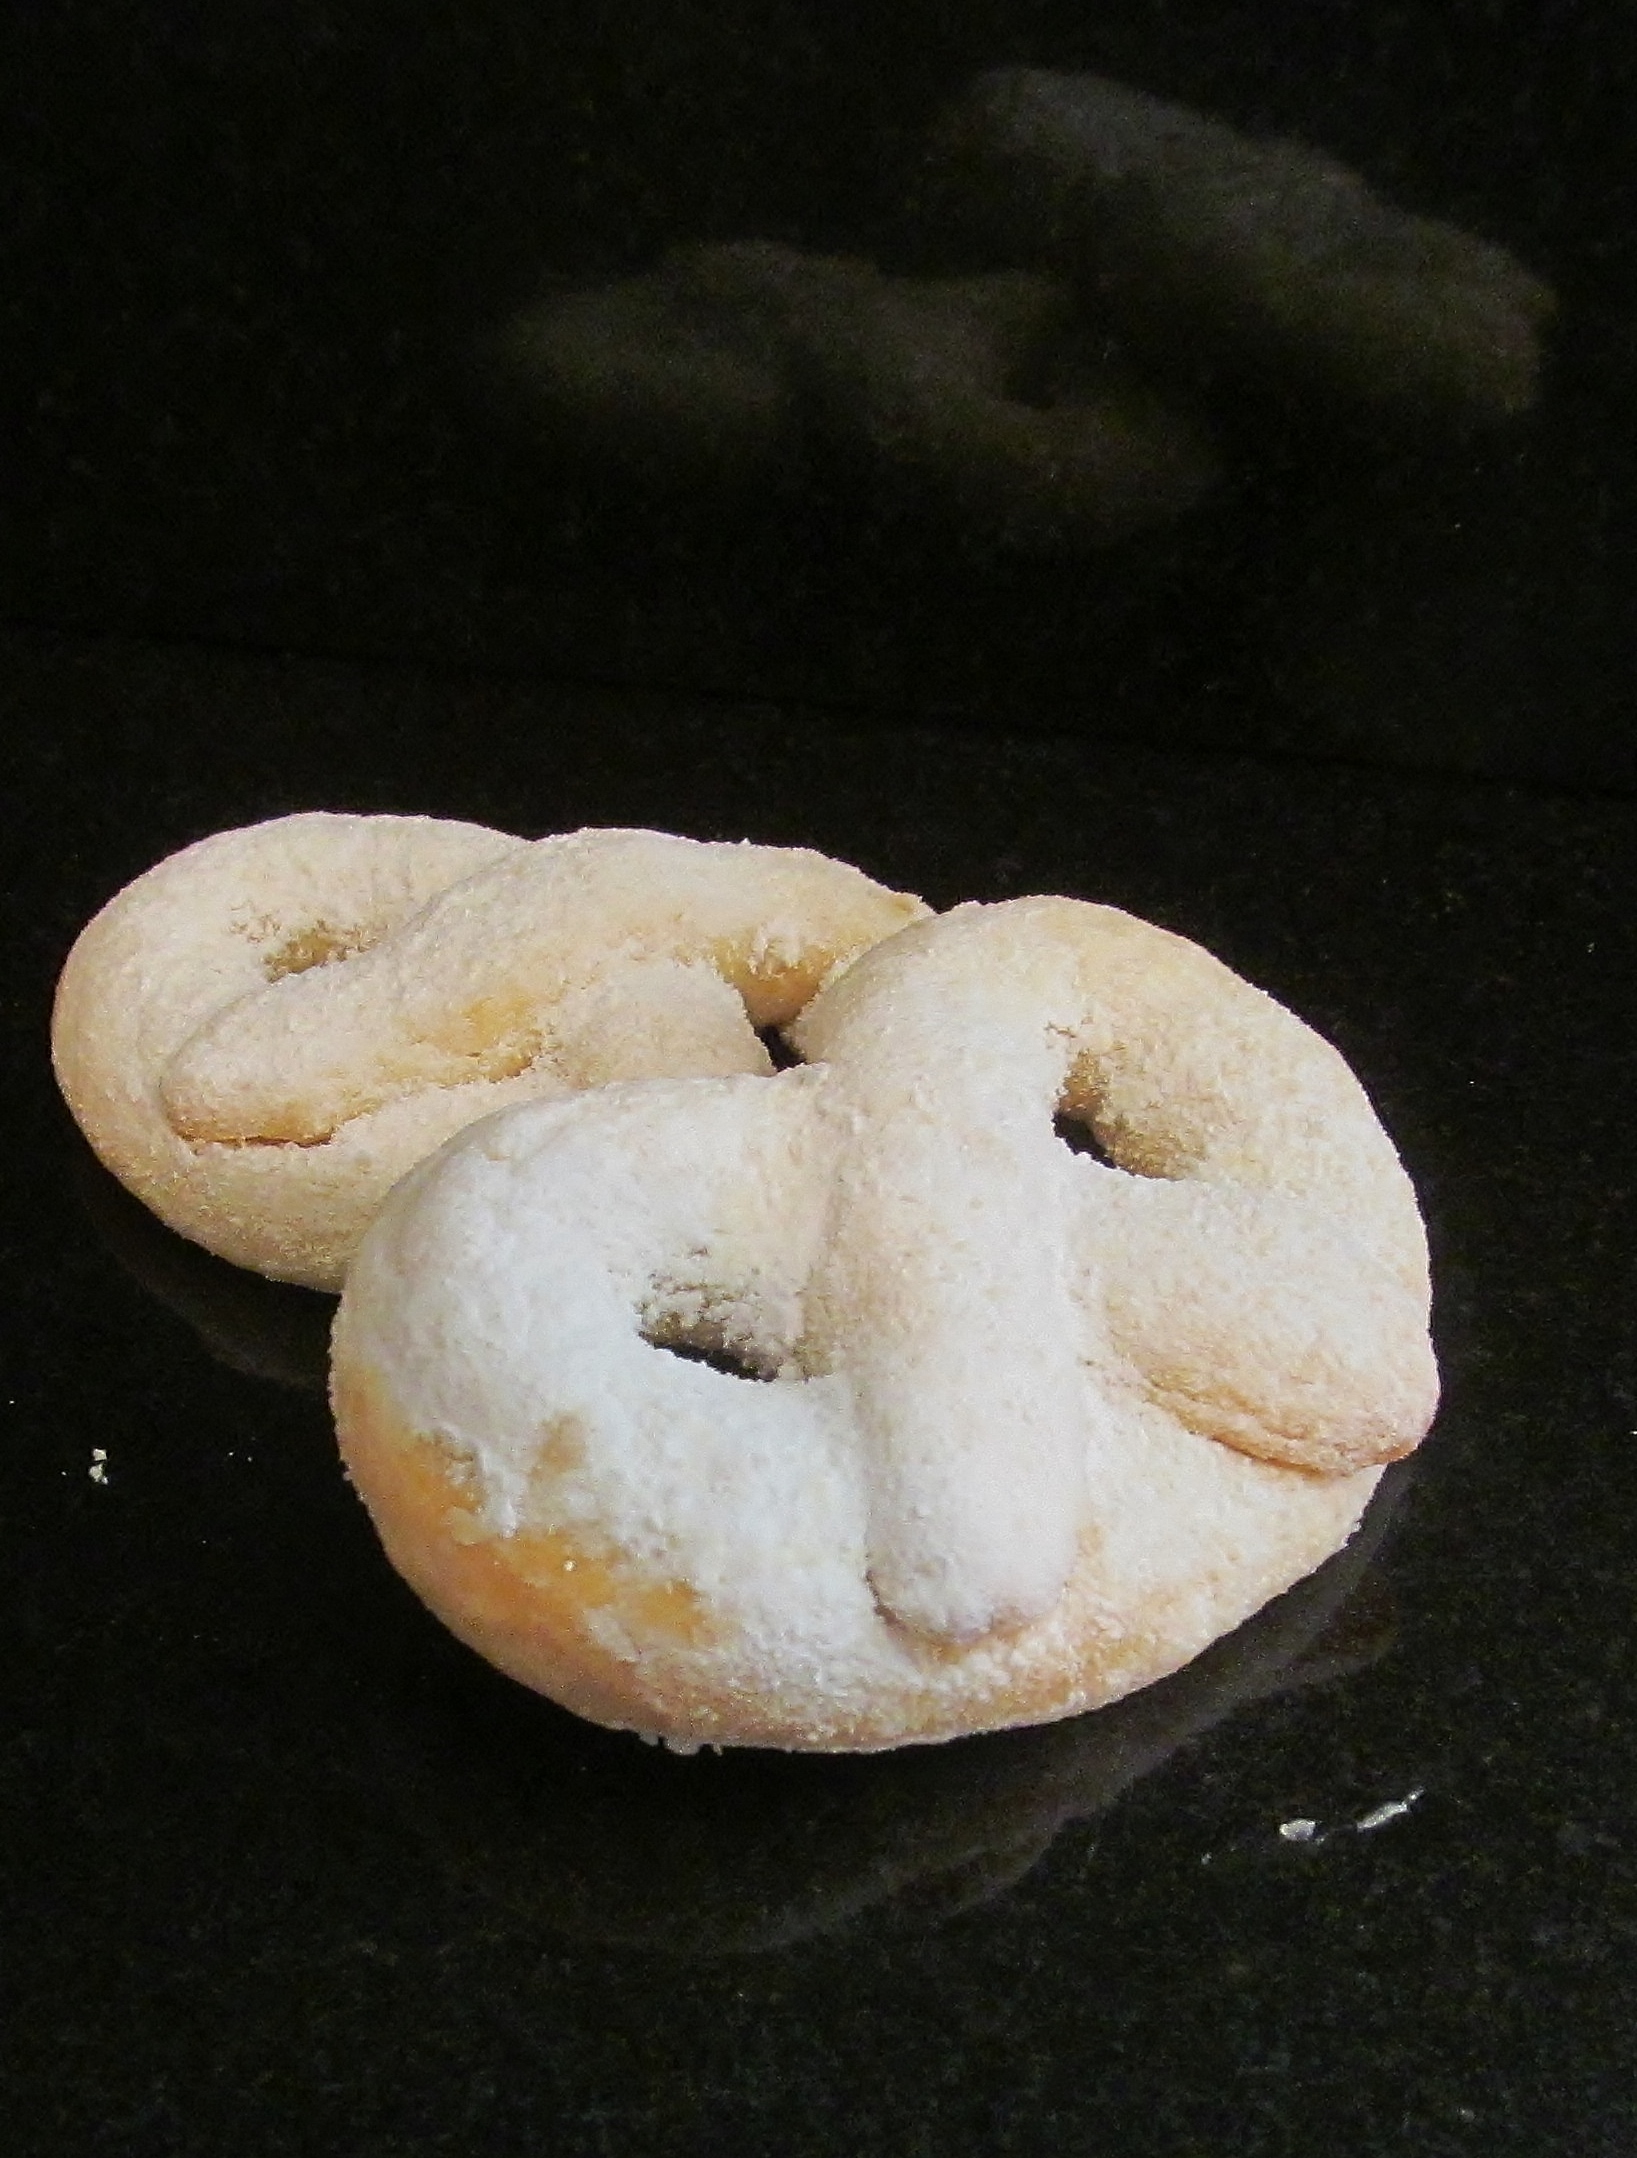
The second recipe was Mary’s Sugar Pretzels, I had no idea how these would turn out as I have lived a very sheltered life and never eaten a pretzel – sugared or otherwise.  It started with Mary’s instructions to rub the butter into the sugar- never my favourite past time! Mary then asks you to stir in the sugar and the egg and vanilla extract until the pastry comes together – and miraculously it did! I kneaded it lightly, wrapped it in cling film and  chilled it until firm. Mary then asks you to divide the dough into walnut sizes and roll out into a thin sausage and then twist into the “traditional ” pretzel shape- thankfully Mary had a picture to roughly guide me in the right direction. Bake for 8 minutes – or as Mary says until they barely change colour and then lift onto a cooling rack and dust thickly with icing sugar.

Mary Berry's Sugared Pretzels

I followed Mary’s instructions to the letter and I think they turned out okay, I thought they were a fairly bland biscuit and probably would not bake them again.

Kim's sugared pretzels

I dutifully divied the biscuits up so we had some and the chief tasters had a plate…unfortunately hubby said that the biscuits “just slid” off the plate, onto the patio when he went to deliver them and so they had quite a few less this week than they should have done- oh well, they do say my baking is expanding their waistlines so  a few less won’t harm them!

shrinking waistline

The countdown continues and I have now reached the landmark number…….

30

Week One Hundred & Twenty One – Mary Berry’s Quick Granary Rolls & Chocolate Rum Cake

Week 121 and yes I confess this post is long overdue. I will explain why a little later. I delved into Mary Berry‘s Baking Bible with my hubby’s birthday in mind. He wanted to have a b-b-q with some “exotic” meats such as buffalo and I found Mary Berry’s quick granary rolls for the burger buns and her chocolate rum cake for his birthday cake- perfect.

I began with the quick granary rolls. Mary asks you to  mix all the dry ingredients together and rub the butter in with your fingers. Mary then asks you to add the milk and water mixture in a “continuous ” stream while mixing the ingredients to a dough and she suggests using a machine with a dough hook. At this point I read and re-read the recipe, Mary definitely asks you to add 3/4 pint each of tepid milk AND water. I thought this was a lot of liquid but I thought “Mary has been doing this for years and knows what she is doing”.

Mary Berry's Quick Granary Rolls

I ended up with a gloopy mess that even with the dough hook didn’t resemble anything like a dough. I added more flour- I had been using a white spelt flour that I had been given and a granary flour and added more of both until the liquid became a dough.

Dove Spelt Flour Hovis Granary Flour

Kim's dough hook

This took a long time and an awful lot of flour to achieve this. When I had got it to the dough stage, I divided it into the roll shapes and covered them to rise. I then checked on the rising to the Berry blog to see if Anneliese had struggled with this and yes, she too had the liquid issue and had to add more flour so I am glad I was not alone in this. Once the dough had proved, I baked them and even though I had to use an awful lot more flour than the recipe said, I was pleased with how they came out and the buffalo burgers tasted very nice inside these rolls. Hubby was very cheeky though and took a photo of them and said he was pleased with his wife’s baps! This was after we were laughing at one of the search terms on the blog where someone had searched for “kim’s buns”!

Kim's quick granary rolls

The second recipe was Mary Berry’s chocolate rum cake. This was for hubby’s birthday and involved two of his favourite things- chocolate and rum!  I started by breaking up an awful lot of chocolate into a bowl. As usual, Mary asks you to use dark chocolate and I compromised with 3/4 dark chocolate and 1/4 galaxy milk chocolate.. When this has melted, let it cool and whisk the egg yolks and sugar together, then add the chocolate and rum then fold in the flour and almonds.

Mary Berry's Chocolate Rum Cake

In a separate bowl, whisk the egg whites until stiff and fold into the mix and pour into the cake tin and bake. When cooked, while it cools, make the filling/icing by breaking yet more chocolate into a bowl- same mix for me, add loads of butter and stir lots. Cut the sponge in half and use this chocolate icing to sandwich the two sponges together and ice the top.

Kim's chocolate rum cake

Once this was done and set, I then decorated it for hubby’s birthday.

Hubby's birthday cake

We had a lovely b-b-q using meat ordered from the alternative meat company and their buffalo burgers were delicious. Hubby, I hope you had a lovely birthday and this blog is dedicated to you for your birthday.

happy birthday hubby

The countdown continues and has now reached ……

32

Now finally the reason this blog is so late – not long after I baked these, I went down hard with flu/norovirus and was really knocked for six with both. I was literally in bed for five days with aching muscles, fever and upset stomach.  I lost a stone in a week and even though I went back to work probably before I should, I was not up to baking or blogging.

flu

Week One Hundred & Eleven- Mary Berry’s Wholemeal Sultana & Apricot Rock Cakes & Singing Hinnie

Week 111 and another late blog, think this is the theme for 2015! I delved into Mary Berry’s Baking Bible and wanted to find some bakes that were fairly plain and simple and the wholemeal sultana & apricot rock cakes and singing hinnie certainly fitted this brief.

I began with the wholemeal sultana & apricot rock cakes and this was a simple Mary recipe that was a throw every ingredient in together and mix. Then use 2 teaspoons to put rock sized pieces on baking trays, sprinkle with a little sugar and bake.

Mary Berry's wholemeal sultana & apricot rock cakes

Mary suggests as they have wholemeal flour in , that they are eaten fairly quickly as they will dry out but I kept them under my baking dome and they lasted for several days without drying out.

Kim's wholemeal sultana & apricot rock cakes

The second recipe was Mary’s singing hinnie, a northern recipe. It is like a giant drop scone and Mary tells you that it makes a singing noise while it cooks. If it did- I couldn’t hear it!

Mary Berry's singing hinnie

I had read the Rising to the Berry blog and remember it said that this was not one of Anneliese’s favourite recipes. I must admit that it seemed to go well for me- maybe because I divided my mix into two pieces and rolled each one out into a round so it was the thickness Mary suggests and it fitted in my big frying pan as I don’t have a griddle. Mary suggests it is best eaten warm, split and buttered and put back together- she wasn’t wrong, it was delicious and certainly a recipe that I would consider doing again.

Kim's singing hinnie

The Comic Relief Great British Bake Off continues and I watched last week’s with glee. I have missed the GBBO and this certainly has been entertaining. Episode two was very entertaining. If you missed it, you can see it here. Please consider buying the recipe book to help you raise some money for your Comic Relief Bake Off.

The Great Comic Relief Bake Off

Week One Hundred & Nine – Mary Berry’s Courgette Loaf & Creme Brulee

Week 109 and I am back in the baking saddle but not so much with the sitting and putting the fingers to the keyboard- oh well. i delved into Mary Berry‘s Baking Bible and it was quite apparent this week that there are not so many recipes left now to do and I am going to have to make a lot of celebration type cakes this year so watch out for- Happy Sunday cakes or Happy Weekly Shop Cakes or just Happy it’s one of the only recipes left cakes!


Mary Berry's courgette loaves

Anyhow, I found this unusual recipe not yet done- Mary Berry’s courgette loaves. The recipe makes 2 loaves- quite handy for the chief taster! This recipe involved grating loads of courgette- my machine featured last week came in very handy for this. This is one of Mary’s throw all the ingredients in and mix, then divide between 2 lined loaf tins and bake. The mixture looked ” different” and a bit yuk to be honest

Kims courgette loaf mix

The finished loaf looked fab and it didn’t look like a veggie loaf!

Kim's courgette loaf

Mary suggests you put one in the fridge and one in the freezer- we put one in the fridge and one in the chief taster!

funny

The second recipe was Mary’s creme brulee. This involved numerous egg yolks , and almost bucket loads of single and double cream- oh and sugar and vanilla extract- so really healthy for you! Mary asks you to whisk the egg yolks with the sugar and vanilla, then heat the cream until it is just too hot to stick your finger in- I took her word for this, I didn’t fancy a burnt finger! Then allow the cream to cool slightly and whisk all the ingredients together. Mary then asks you to either pour this into a large bowl or some ramekin dishes and then stand in a roasting tin, fill up halfway with hot water and cook in the oven until set. Once cooked, put in the fridge over night.

Mary Berry's creme brulee

The next day, pour some demerara sugar on the top of each one and either place them under the grill or use a cook blowtorch on the top. I just so happened to get a blowtorch for Christmas, thanks to my other mum who probably got fed up with me borrowing hers. It was great fun!

blowtorch

Once the sugar had been caramelised on the top of the brulees, Mary asks you to put them back in the fridge again overnight and then enjoy. I made 8 in ramekin dishes and we gave 4 to the chief tester- and he and my other mum tucked into 2 each back to back- and so did we!

Kim's creme brulee

Naughty but nice!

naughty but nice


Week One Hundred & Eight – Mary Berry’s Cheese & Celery Crown Loaf & Basic White Meringues

Week 108 and I am on track this week with my blog- for a change! This week I delved into Mary Berry‘s Baking Bible with more enthusiasm and found the cheese and celery crown loaf recipe and the basic white meringues. My goal this week was being able to use what ever kitchen gadgets I have to help with my sore hand.

Mary Berry's Cheese & Celery Crown Loaf

I began with Mary Berry’s cheese & celery crown loaf and got out a large bowl. I mixed the flour and the butter together with my hand mixer. I added the pepper, the chopped celery and the garlic from my garlic roller.

Kim's garlic roller

I then added the cheese from my electric grater! I stirred these together and then added the milk and the beaten egg. I added the dough hooks to my mixer and mixed it until I had a lovely dough mix.

cheats grating

Mary suggests you either knead the dough lightly into a neat round and put on a baking tray or divide the dough into 12 pieces and roll each piece into a ball. Place the balls into a greased cake tin , sprinkle with grated cheese and bake for about 40 minutes.

Prepared cake tin

This worked well for me and the finished crown loaf looked good and smelt amazing. I have managed to make a loaf without hurting my hand and this week my hand has been recovering in this brace which keeps it still so that the ligaments can heal with the occasional break for some physio so that I retain full movement.

Kim's sore hand

The second recipe was Mary Berry’s basic white meringues. I had to find some recipes this week that hubby could also eat- he had minor surgery in his mouth on his jaw and has had a liquid diet for a while. I thought the meringues with some ice cream might tempt him!

This recipe needed 3 egg whites so i used my egg separator to do this and save my hand and then my hand mixer to beat the egg white until thick and glossy.

Kim's egg separator

I then added the sugar , a little at a time , continuing to beat with the mixer until all the sugar was in. Mary then asks you to add the mix into an icing bag.One tip I have found really useful is to buy disposable icing bags, really easy to find now.

Kim's disposable icing bags

I then use a large glass to hold the bag open so that you can put the mixture into the bag really easily.

Kim's icing bag holder

I then piped small rounds as per Mary’s instructions and put the meringues in to bake for about 1 1/2 hours. I then left the oven door open while turning the oven off to allow the meringues to cool.

Kim's meringues

Hubby has yet to sample the meringues but hopefully they will be tasty with some ice cream. Hope you feel better soon hubby. xx

get well


The countdown continues and now there are 56 recipes left to go…..


Week One Hundred & Seven-Mary Berry’s Nusskuchen & Jumbles

Week 107 and yes- I know- I am late again with the blog but today I am doing both last week’s and this weeks so will catch up so you get two for one today! I will get into the swing of this blogging again! I delved into Mary Berry’s Baking Bible looking for a birthday cake for my chief taster ( dad-in-law) and saw the Nusskuchen which is a german nut cake-perfect! The other recipe I found was Mary’s jumble biscuits.

Mary Berry's Nusskuchen

I started with the Nussskuchen cake which was quite a fiddly sponge. I had to roast the hazelnuts to remove the skins and then crush them to add to the sponge which had various stages to it. I roasted the hazelnuts and then followed Mary’s instructions to roll them together in a tea towel to remove the skins. What I hadn’t mentioned was that just before Christmas while walking my hairy hoolies on a street walk, my big lad suddenly ran across in front of me and I fell- the classic fall onto both knees and both hands and grazed my nose. I dented my ego , skinned my knees and had sore hands but picked my self up and finished the walk.

dog walking


I didn’t realise how much i had hurt myself until a week or two later when i was struggling to hold things in my right hand and it really hurt when  I rotated the wrist. I had it x-rayed but no break thank goodness but strained or pulled ligaments and advised to keep the thumb/wrist strapped to help it heal. This has proved to be good except for baking and removing the skins from the hazelnuts really hurt! Mary asks you to beat the sugar and butter together, beat in the egg yolks and stir in the crushed hazelnuts. Mary then asks you to dissolve a spoonful of coffee in some warm milk and add it to the mix, then fold in the flour. Mary then asks you to whisk the egg whites in a separate bowl until light and fluffy then fold this into the other mix.  Put this mix into a 20cm tin and bake.

What Mary then says is that while this cake is baking, prepare the filling. Peel , core and slice some baking apples and put them in a pan with some apricot jam, lemon juice an rind and cook slowly until the apples are soft but retain their shape. Leave to cool. At this point, all was ok and I was on track. I took the sponge out of the oven and took it out of the tin. At this point I realised I had a problem. Mary asks you to cut the sponge in half. I want to know how I can do this with such a thin sponge so i did the only thing I could think of, I made another sponge- and yes, I  had to roast more hazelnuts and then remove their skins- OUCH!!! the things I do for love!

Kim's Nusskuchen sponges


sore hand

Finally I had 2 sponges, I added the apple and some cream to the middle and melted some chocolate for the topping with some chocolate buttons to make it a birthday cake.PHEW!

Kim's Nusskuchen cake

The second recipe was Mary Berry’s jumbles biscuits. This was an easy dough to make, one of Mary’s throw all the ingredients in a bowl and mix.

Mary Berry's Jumbles

Mary then asks you to divide the dough into 32 pieces.  As my hand was sore, i divided mine into 16 and made my biscuits a little larger. Mary suggests making the biscuits into the shape of the letter S. I did play with the idea of making them into various initials but stuck with the S shapes as it was easiest on my poor hand.

Kim's jumbles

When you read the blog, it must seem like we lurch from one accident, incident or operation to the next- sometimes it does seem like that!

I

Week Forty Nine – Mary Berry’s Focaccia Bread with Onion & Balsamic Topping

Week forty nine and I think this has been the most technical of my bakes to date and the one that has taken most of the day as it’s bread and needed rising time. Mary Berry‘s Baking Bible has the nicest photo of hers and all through my bake, I just hoped that it turned out at least resembling hers!

Mary Berry's Focaccia Bread with Onion & Balsamic Topping

The beginning of the recipe asks you to add every ingredient for the dough into a bowl and mix either by hand or with a mixer with dough hooks. I had never used my dough hooks before and looked forward to playing with them. They made short work of the ingredients and no sooner had I started, than I had a dough bowl ready to start working on. I tipped it out onto my floured surface and set to work, it’s very therapeutic to work dough! Although my method is probably more old school as I was taught in my Home Economics lessons rather than the Paul Hollywood swing the dough around and whack it down method! Once kneaded, I put it in a clean oiled bowl and covered it with clingfilm. I left it for an hour and while it was “proving” I set about making the onion and balsamic topping. Mary asks you to add a teaspoon of olive oil to a pan, cut 2 onions and fry them for several minutes, then add thr lid and turn down the heat and leave for 20 minutes. The next step was to add some balsamic vinegar and sugar and thyme , fry again briskly and then season and allow to cool. Mary asks you to return to your dough and “knock it back” for about five minutes, roll it out and pop it on a baking sheet with the topping on it, place it in a bag and allow to proof again for half an hour…zzzzzz. Finally I could put it in the oven for about 25 minutes.

The final result, no soggy bottom! But the onion is lightly singed around the edges, but on the whole I am happy with it. The only problem is that it is HUGE!! Hubby and I can’t eat it all so we are going to cut it in half and take some to the parents!

Kim's Focaccia Bread with Onion & Balsamic Topping

I loved watching the Great British Bake Off this week with breads and maybe that’s what inspired me to do the Focaccia Bread. I must say, I was impressed with Frances’ matchbox and her bread sticks.

Week Thirty One – Mary Berry’s Special Shortbread Biscuits

This week I wanted a quick easy bake, I will tell you why a little later…. so I decided to do Mary Berry‘s Special Shortbread Biscuits as I always have a weakness for shortbread.

Mary Berry's Special Shorbread Biscuits

I needed just three ingredients for this, plain flour, butter and light muscovado sugar. Mary “just” says put the flour and sugar in a bowl and rub in the butter and form into a dough….sounds easy huh? Well, I tried ….and I tried…..but it was so crumbly , and I managed to get it into a dough but then it fell apart when I tried to roll it out. Luckily, I thought I would take a peek at Rising To the Berry blog to see how Anneliese got on with this. I was thankful that she struggled with the crumbly mix too. I eventually put the mixing bowl in the microwave and put it on high for 10 seconds. I allowed the butter-which had been at room temperature already to soften a little further and keep the dough together. I managed to roll it out and cut out the biscuits. Even with the smallest cutter, I struggled to get the amount Mary says out of this. At the end of the recipe Mary recommends other varieties including cherry and walnut. They both sound delicious but when your hubby is one of the tasters and doesn’t like either of these, I had a little look in my cooking box and found pistashio nuts. I thought perhaps one or two biscuits topped with pistashios might be different but again hubby wasn’t so keen.

Into the oven they went and I set the timer. After the timer went ping, I checked them and to my surprise they were all a golden brown with a fairly even bake so I was pleased! I will even go so far as to say that the pistashio shortbread was lovely!

Kim's special shortbread biscuits

Next week is hubby’s birthday so I feel another Mary Berry “special” cake coming on.

Week 26 – Mary Berry’s Hot Cross Buns

As promised, the Easter recipes begin here, and with hot cross buns. Yes I know it’s technically not the right time to make and eat them but any excuse for a bake! This bake has taken the longest of all my bakes so far, because it involved yeast and rising time so it took most of the day to do.

Mary Berry's Hot Cross Buns Recipe

The dough itself seemed easy enough to mix together and the 10 minutes of kneading it seemed to fly by and it’s very therapeutic taking out your frustrations on a piece of dough! I then needed to leave the dough to rise in a warm room – in our house, that’s not so easy but after looking on the internet, it recommended putting your oven on low, with the door open and rest the bowl on the open door which is what I did, and the kitchen felt cosy too. After an hour and a half, the dough had doubled in size and was ready for the next step. Mary then asks that you knead it again for several minutes then divide into 12 and place on a tray, and cover with clingfilm and leave to rise again for half an hour.Usually at this point, I find that Mary’s estimate of how many can be made out of a batch are often optimistic but on this occasion, I found that I had 16 hot cross buns!

Kim's buns final rising!

While the buns were rising again, I made the small amount of pastry needed to add the cross to the top of the buns, as I felt that just marking the top of the bun with a cross was not traditional enough. I then rolled the pastry out and cut it into strips ready to go on the buns.

the cross strips for the buns

Finally, the buns were ready to have their cross, and then into the oven they went for 15 minutes. I set the timer and five minutes before they were rady, I made the glaze by dissolving sugar into water and when the buns came out, they had a liberal coating of the glaze.

Kim's uncooked hot cross buns

For my first foray into making buns with yeast, I was quite pleased with the way they turned out!

Kim's finished hot cross buns

As you can see, my usual two baking fans were in their usual spot waiting to see if there were any left overs or anything dropped , but sorry guys, no dried fruit for you too, it’s like chocolate, very dangerous for dogs , so you can have a doggy treat instead today!

The Hairy Hoolies

Week fourteen – Mary Berry’s Very Special Scones & Special Fruit Scones

It’s been a very busy week and an even busier weekend and I wasn’t sure I was going to get time to bake this week but I managed to find time – at the expense of the ironing…..oh well……(smile).


I thought scones would be fairly quick and easy this week and the recipes for Mary Berry’s special scones and special fruit scones were so similar, I kind of cheated and made the dough, halved it and added the fruit, so covering two recipes in one week. Otherwise, I will still be at this challenge a year from now!

Any way, the mix was straight forward, the dough was sticky, as Mary explains and it turned out very sticky. I found my fluted cutter and cut out my first batch. I placed those on my baking tray and then rolled out the second fruited batch and then into the oven they went.

Mary recommends 10-15 minutes for the bake and having made a few of her recipes, and often had to add a few minutes, I set the timer for 15 minutes…….oh silly me! Well Mary says they should be risen and golden, I think “golden” could loosely describe the colour of them! I think they might be a bit crunchy!