Week Fifty Two – Mary Berry’s St Clements Muffins

Week fifty two….eventually. You may have stopped by to check on what last week’s bake was and noticed that nothing had appeared! Well that’s because it was an absolute s*** of a weekend, I won’t bore you with the details but between a hole in a water pipe and me damaging hubby’s car, let’s just say I wasn’t in the best frame of mind to bake!

Mary Berry's St Clements Muffins

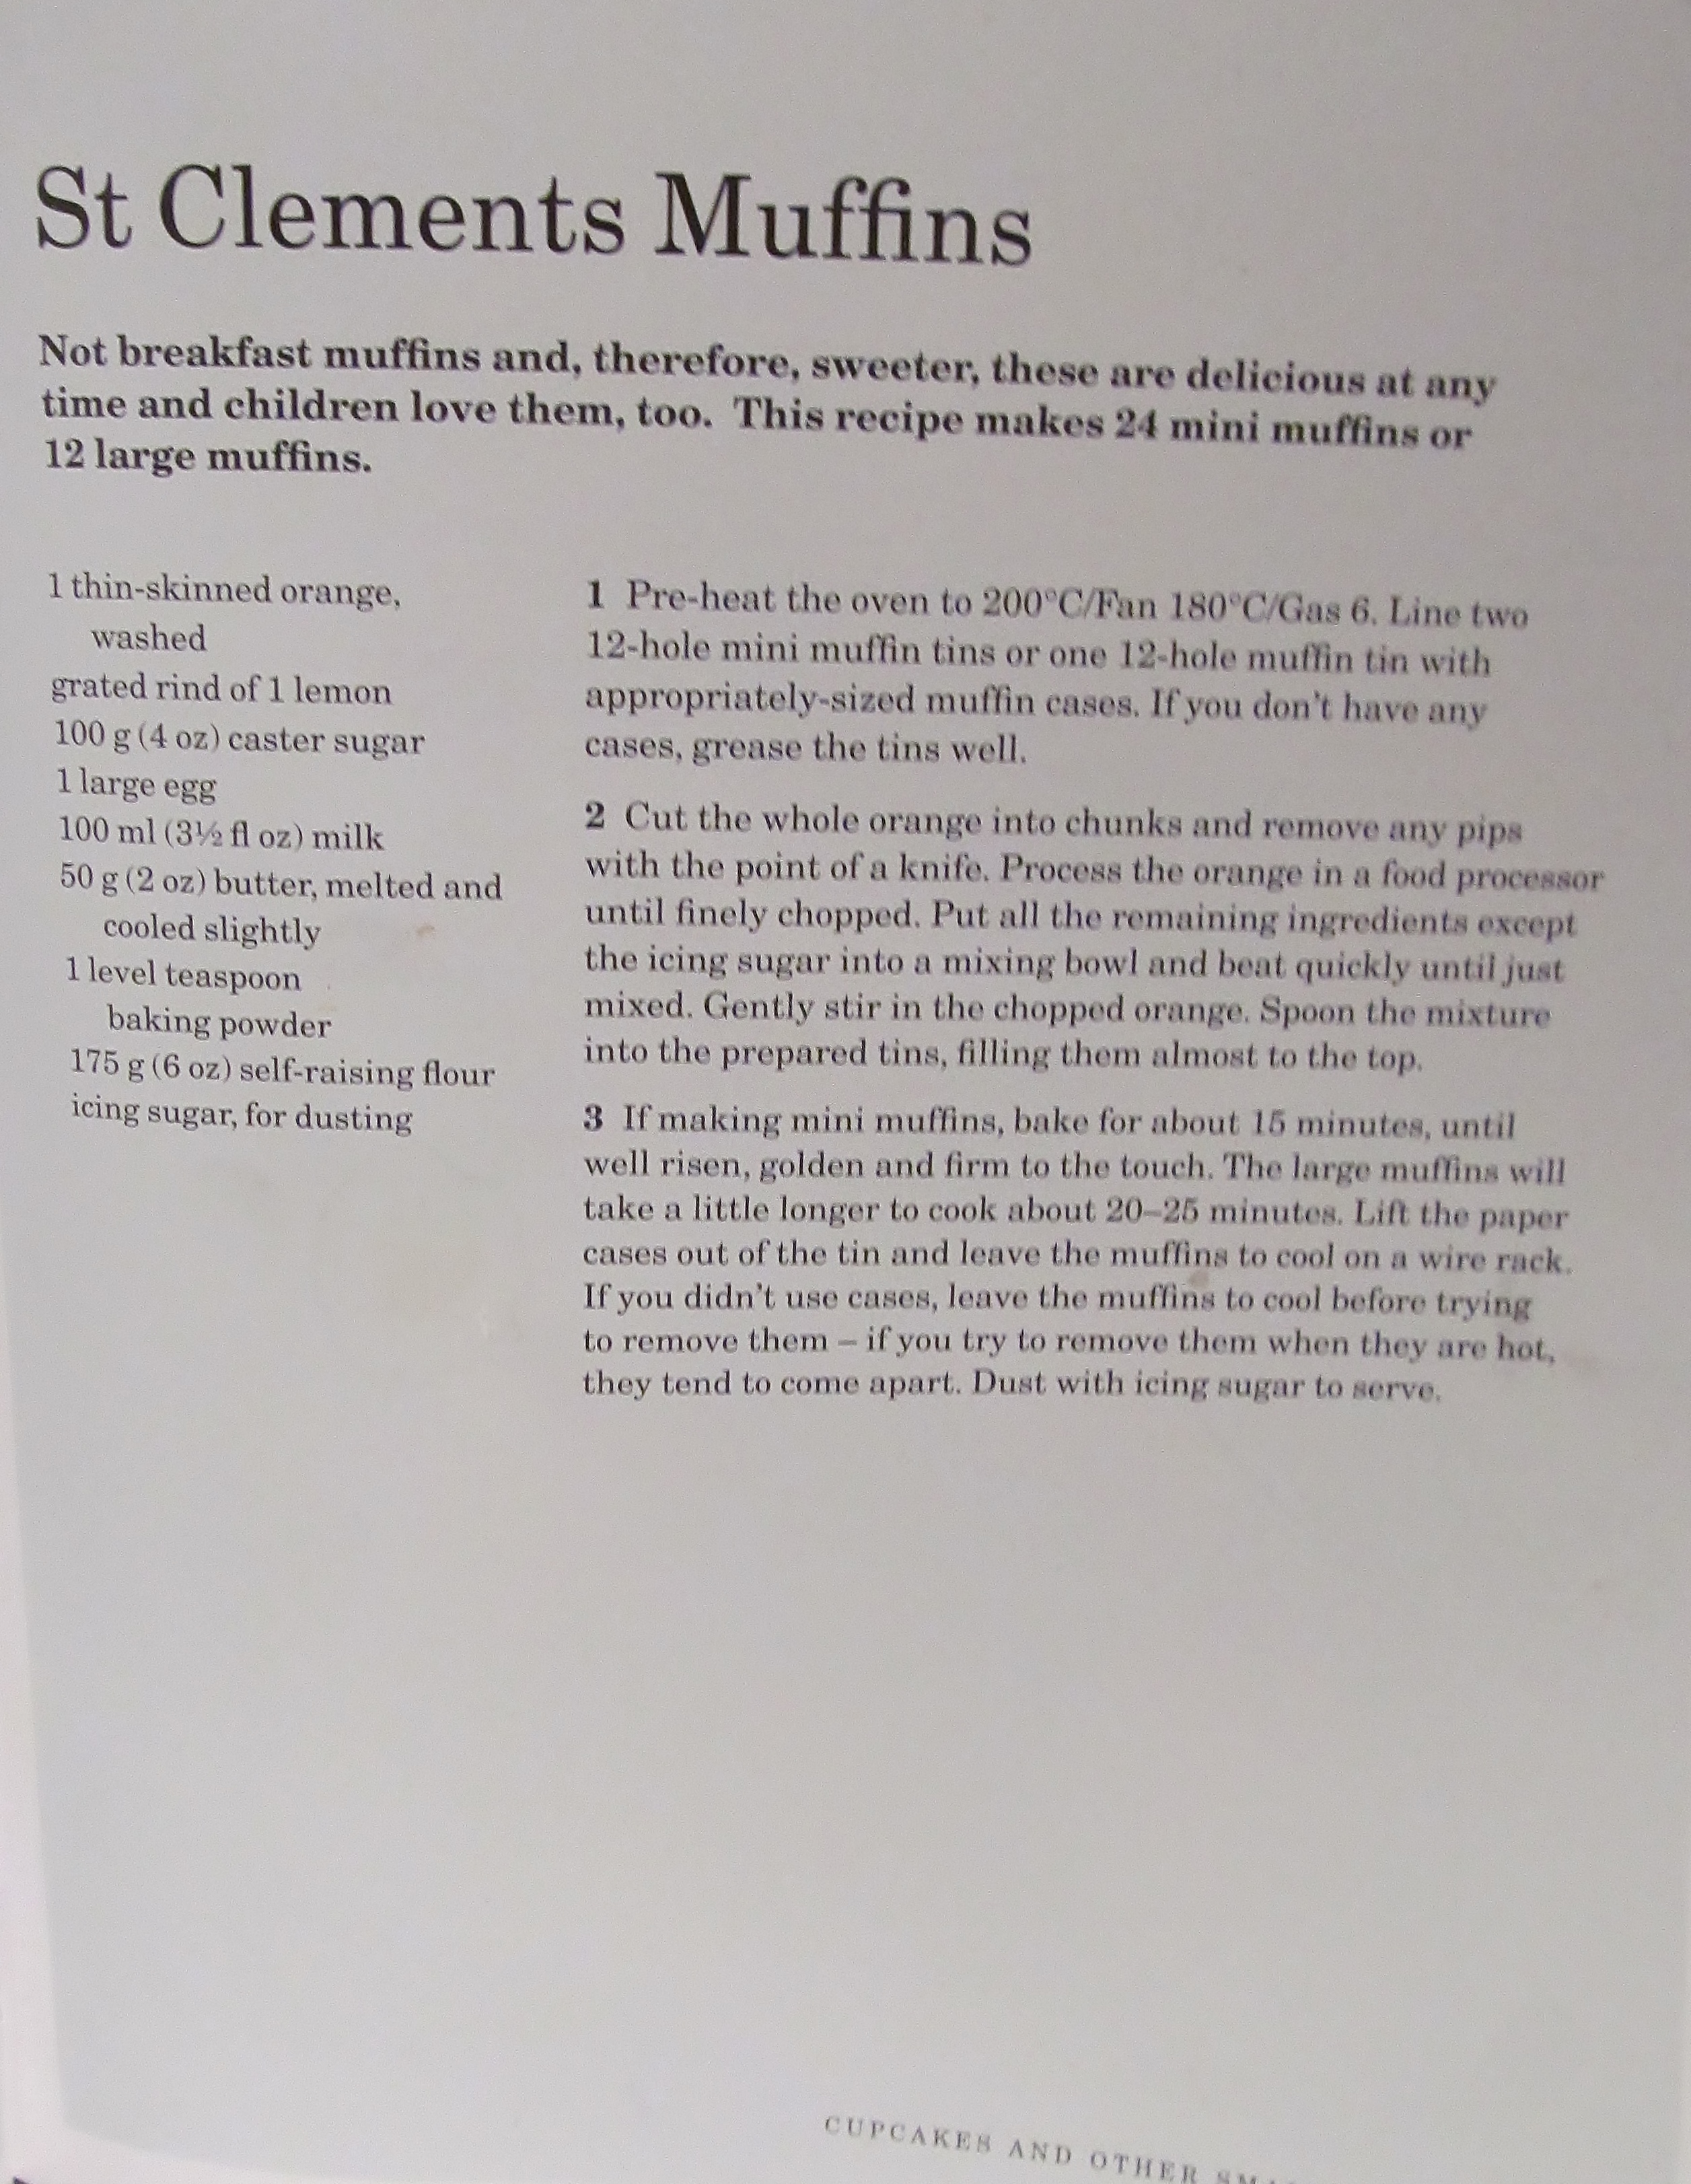
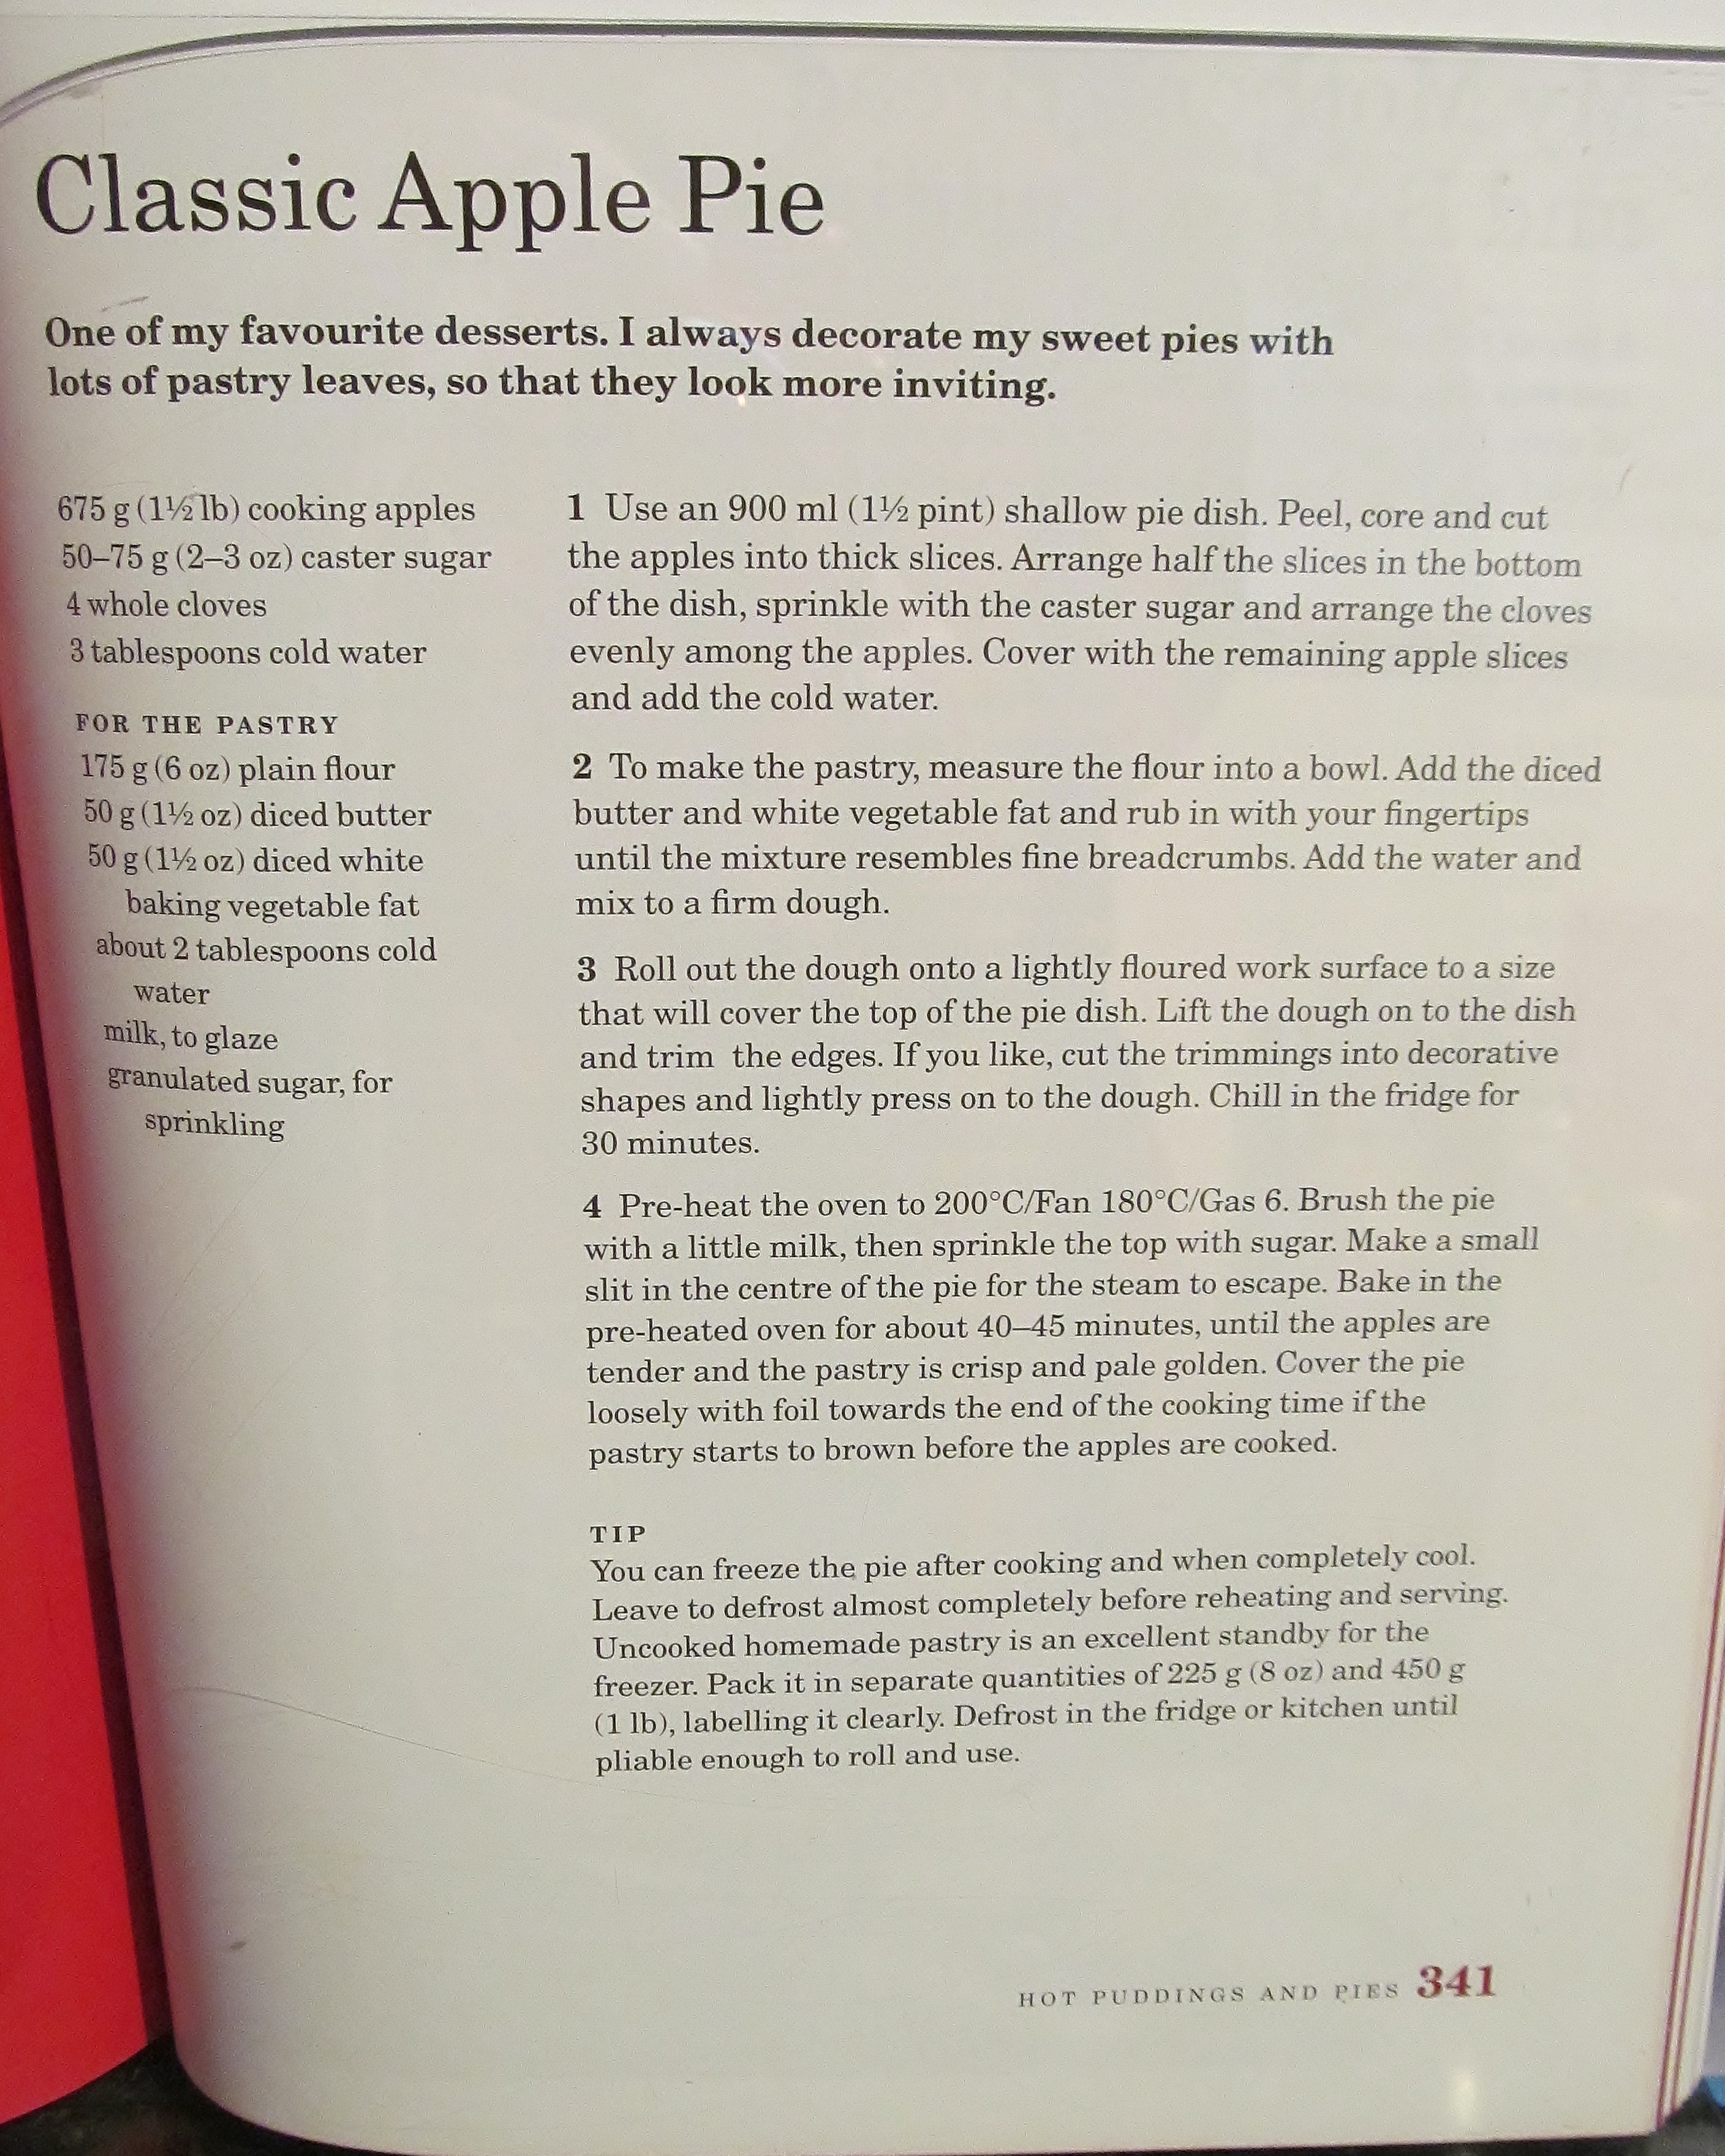
I chose Mary Berry‘s St Clements muffins, they sounded lovely but given the weekend events, maybe I was aiming too high? The recipe was straight forward enough, and I was careful not to overmix the muffin mixture. I divided the mix between the cases and popped them into the oven to cook. After the pinger went, I checked them and took them out of the oven. They looked a nice colour, and were springy in the middle. I left them in the tin for a while and then put them on the rack….and watched them deflate alarmingly!!! what a disaster- it about capped my weekend off.

Kim's disastrous St Clements Muffins

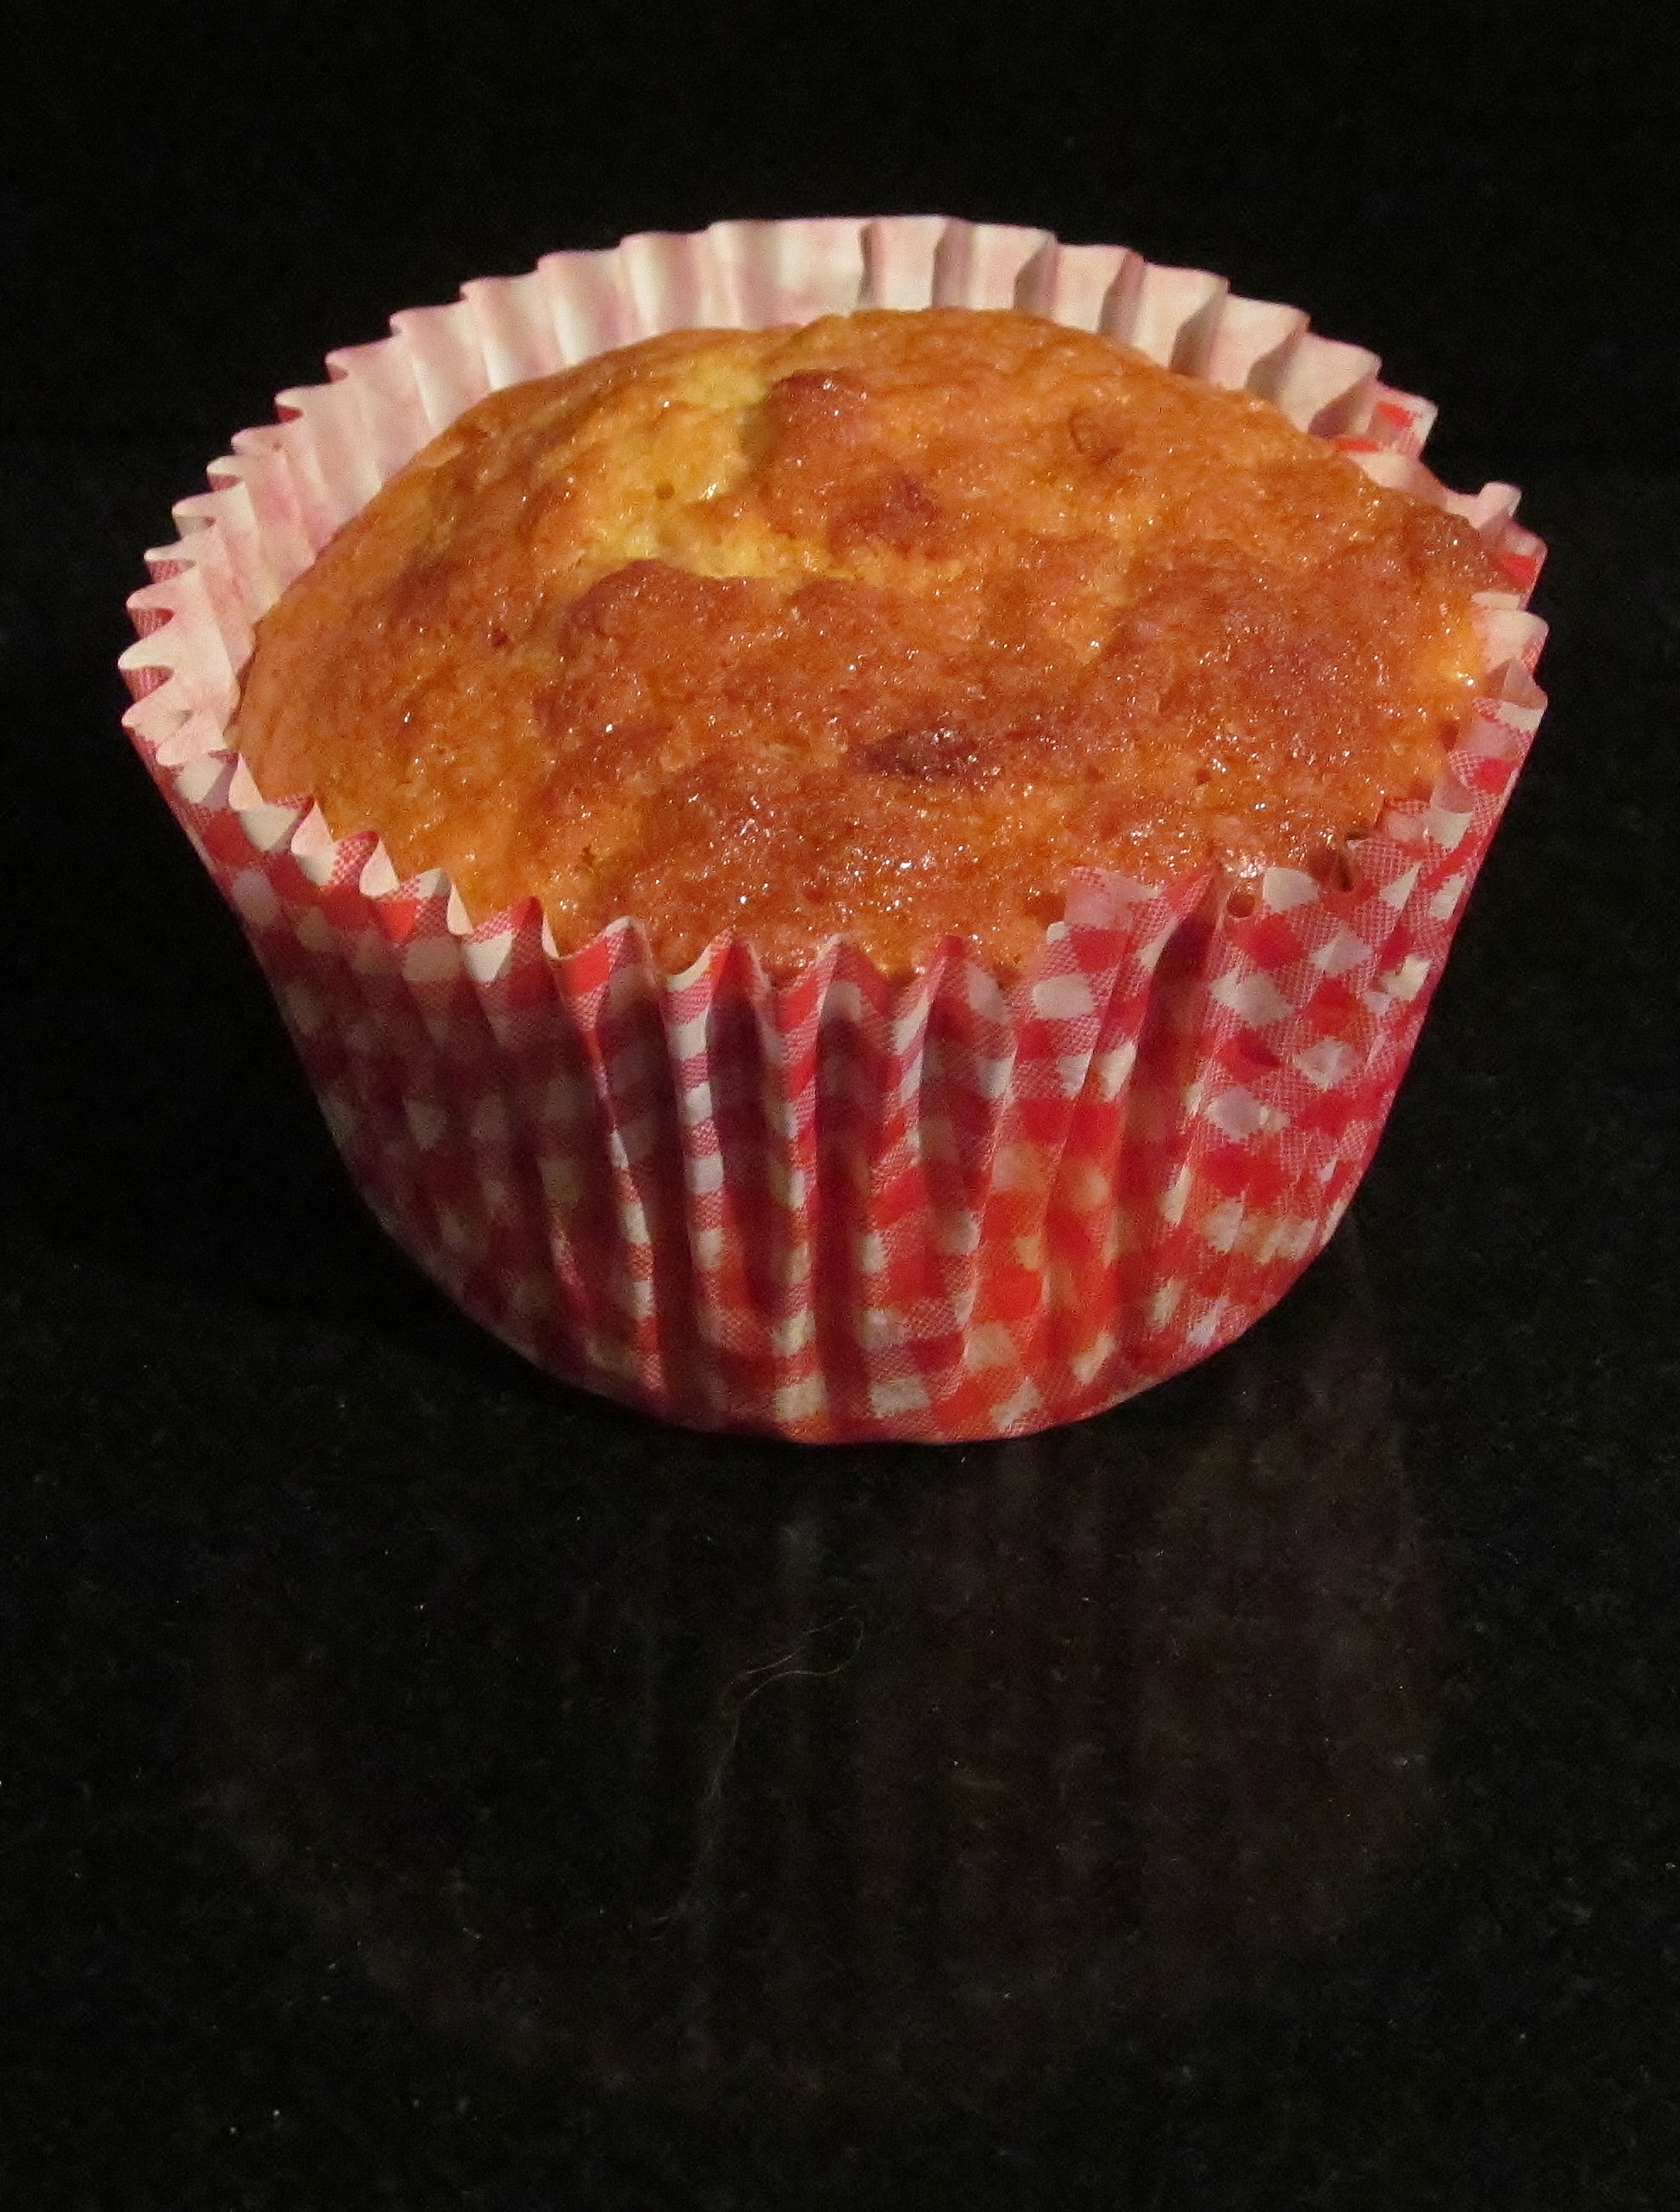
I set about making a second batch, I was not going to be defeated , I followed the recipe really carefully, divided the mix again into the cases and baked them. I allowed a little extra time for cooking and when the pinger sounded, I left the muffins in the tin to cool slower and then put them on the rack. I still wasn’t overly impressed with them. They were not my idea of a muffin, light and airy with the distinctive muffin top and they really stuck to the cases.

Mary Berry's St Clements Muffins

I don’t think muffins are my thing, I have since googled “foolproof muffins” and found that like me, there are loads of people out there whose muffins do not rise as they should. I will aim to defeat my muffin nemesis …..but not this weekend!

Week Forty One – Mary Berry’s Hazelnut Meringue

So many recipes done , yet so many more to go! I thought it would get easier to make a choice on what to make but it hasn’t yet! This week needed to be a pudding to follow a b-b-q with my mum, hubby, my other mum and dad and the hairy hoolies!

Mary Berry's Hazelnut Meringue

I made the meringue as Mary Berry’s Baking Bible described, and folded in some ground hazelnuts at the end. Then I had to pour the mix between 2 lined sandwich tins which would help the meringue hold it’s shape. Then into the oven they went and I set the timer. When the pinger went, I took the tins out, allowed them to cool slightly and then tipped them out and put them on the cooling rack. I left them to cool totally and put them in an airtight container overnight.

The next morning, I added some weightwatchers thick cream and raspberries to the middle and top and put the whole thing in the fridge. Mary recommends you do this at least 3 hours before you want to eat it so that it will slice easily.

Kim's Hazelnut Meringue

Well, Mary was right, it did slice beautifully and made a nice light pudding to finish off the b-b-q  on a lovely summers day.

a slice of hazelnut meringue

Week Thirty Six – Mary Berry’s White Cottage Loaf

It’s been an interesting week and this weekend, in particular. I hadn’t got a lot of time this week for my bake, my dog Bailey has not been too well and seemed to get worse over the weekend so , as I have made plenty of white bread before, I am not ashamed to say that I used my bread maker to cut the physical amount of time I needed to spend in the kitchen.

Mary Berry's White Cottage Loaf

I added all the ingredients that Mary Berry uses in her recipe and set the machine off to do the mixing and rising that was needed, it even baked it too! I must say that I get the bread machine out from time to time and we love the smell of freshly baked bread in the house, it’s heavenly!

The loaf came out well, the machine did it’s usual sterling job, and don’t fear, there are plenty of other bread recipes in Mary Berry’s Baking Bible that I will go on to make, and hopefully some of them by hand!

Kim's White Cottage Loaf

As for Bailey, he got to visit the vet, be sedated, have blood tests and x-rays and get discharged back to his very worried owners with various medications. He is extremely dopey and flopping around  but we are all glad that he is ok and home with us where he belongs.

poor dopey Bailey

Week Thirty Three – Mary Berry’s Cheese Scone Round

After the over indulence of chocolate and big cakes of the last few weeks, I searched Mary Berry‘s baking bible in search of something savoury and found this recipe that I had yet to cover.

Mary Berry's Cheese Scone Round recipe

The recipe seemed easy enough and Mary’s instructions as always are clear and concise. I assembled all the ingredients as instructed and ended up with a scone dough that Mary suggests shaping into a round and dividing into 6 sections. This is where I added my own twist and decided to cut them out as usual scone shapes which I think looks nicer and is easier to store. I managed to cut out 9 scone shapes , sprinkled the top of them with the leftover grated cheese and popped them in the oven.

The smell as they were cooking was mouthwatering! After the pinger went off, I had a look at them and they were a beautiful golden colour and pretty even so I was pleased with them.

Kim's cheese scones

I am afraid to say that one didn’t get to cool off totally, before it was sampled but I maintain that this is the cook’s perk!

Week Thirty Two – Mary Berry’s Cappuccino Cake

Week Thirty two and a special bake this week as it was my lovely hubby’s birthday.

After the success of the victoria sandwich cake, I thought the cappuccino cake would go down well with him and reading the recipe, Mary tells you to pretty much throw all the ingredients in a bowl and mix together, but do not over mix (??!!) So, I weighed out all the ingredients, put them all in a bowl and with a quick whizz of the electric hand mixer, job done, just needed to divide the mix between two sandwich tins and into the oven for about half an hour.

Mary Berry's Cappuccino Cake

After the half hour was up and timer had gone ping, I checked the cakes but they were not quite done so another five minutes or so and out they came. They looked lovely and after a few minutes, i was able to take them out of the tins and put them on the cooling racks.

A while later I finished the cakes with quite a lot of whipped cream, and coffee. To add my own spin to it, I added a few chocolate flakes to the top, some chocolate hearts and some candles.

Kim's Cappuccino Cake

Happy Birthday to my lovely hubby, hope you enjoyed your cake! xx

Week Twenty Nine – Mary Berry’s Divine Chocolate Birthday Cake

Greetings! Week twenty nine , just a little late in happening because hubby, the hairy hoolies and I managed to get away last week in our caravan for a long awaited chill out time and we stayed on a lovely site called Fairlight Woods. A beautiful small site with woods all around and doggy heaven! We were only 2 miles from the beach so I was happy too- I find the beach and the waves crashing onto the shore soooo relaxing and the dogs loved it too.

the hairy hoolies on Winchelsea Beach April 2013

Anyhow, back to the bake….as it was my other mum’s birthday, I chose the divine chocolate birthday cake recipe. I got all the ingredients and set off, thinking it would be just another twist on the usual sponge mix. How wrong I was. Mary asks for 5 eggs, 4 of them separated into yolk and white. You put the 4 yolks, a whole egg and the caster sugar in a bowl and whisk until thick and fluffy…..with me so far? Then melt the huge amounts of dark chocolate , add a spoon of hot water with a spoon of coffee granules, allow to cool slightly and add to the egg yolk mix with some ground almonds…..getting interesting isn’t it…….not a jot of flour in sight…..then whisk the egg whites until firm but not dry- an interesting phrase Mary! Then fold this into the mix and pour into the lined cake tin. Bake for 50 minutes or until the skewer comes out clean , allow to cool in the tin for 10 minutes then turn out on to the rack to cool. I can honestly say this is the most peculiar recipe I have followed to date and wondered quite what would come out at the other end- I still had time to do a supermarket run to get a birthday cake if it was a disaster!

I must say, it didn’t look too bad when it came out and when I got it out of the tin, it retained it’s shape and had a lovely chocolatey aroma.

Kim's chocolate cake fresh out the oven

The icing was a breeze in comparison, oodles more dark chocolate ( not my favourite- so I resisted a nibble!) melted, with butter added, allow  to cool to get the consistancy and then cover the cake in it and allow to set. Decorate if you like. I had some pretty icing roses I added to it.

Kim's divine chocolate birthday cake

I took the cake to the birthday takeaway with some sparkler candles- I put five on the cake, and they were so difficult to light,then burned so quickly, we laughed so much just trying to get them done and “Happy Birthday” sung!

sparkler candlesHappy birthday!

Week Twenty Four- Mary Berry’s Deep Treacle Tart

Week Twenty Four and the parkin from last week is sitting there “maturing” so what to make for this week? I decided that a pudding might go down well and treacle tart brings back warm memories of school dinner puddings so off I set on this venture.

Mary Berry's Deep Tracle Tart

The pastry went together well and the flan tin was soon lined and ready to go.

Kim's pastry

The next dilemma was that the recipe called for breadcrumbs, and preferably of the fresh variety, not the “longlife” buy them in a packet supermarket variety. So I salvaged my Kingsmill 50-50 loaf which was on the turn and cut off any bits showing signs of mould. I then put the rest in my food processor and a quick whizz of the blades and hey presto – I had a big pile of beautiful breadcrumbs! These were added to the mleted treacle, lemon juice and rind and then this was poured into the flan tin and into the oven it went.

The result, doesn’t look all that good but it was rather scrummy on it’s own or with custard, although the lemon flavour is rather strong in it.

Kim's deep treacle tart

Oh and by the way, we weren’t overly keen on the parkin from last week- I will stick to traditional gingerbread in future!!!!

Week Twenty Two – Mary Berry’s Classic Apple Pie

As I still have a good amount of last week’s bake left in the fridge, I wanted to bake something that we could eat for pudding this week so I chose Mary Berry’s classic apple pie recipe.

Mary Berry's Classic Apple Pie

I picked out several lovely apples in Morrisons while doing my weekly shop, and had the rest of the ingredients already. The only variation to the recipe was that Mary adds cloves to hers and we are not keen so I sprinkled some cinnamon on the apples.

Kim's apple pie filling

I cut the apples, sprinkled the sugar and cinnamon, added the water and rolled my pastry. Then I needed to decorate it in some way. For Christmas I got a roller that creates lattice work so I decided to try that- what a bad move!!! When it works it looks great but it sure isn’t as easy as it looks!!! I rolled and cut the lattice work and laid it on the top at least 6 times and took it off and re-rolled it until I was happier with it! I guess it will be easier with practice!!! I then used a leaf cutter to cut out some leaves to make the border and finish the pie.

Kim's unbaked apple pieKim's baked apple pie

I am happy with the way it looked and baked and hopefully when we eat some later with a little cream, it will taste as good as it looks!!!!

I have also looked through Mary’s book and realised how many more recipes I have yet to do so will try when possible to double up on a few more!

Week Fifteen (eventually) – Mary Berry’s Key Lime Pie

Mary Berry's Key Lime PieWeek fifteen and I have eventually managed to blog about it. It hasn’t been the best of weeks for various reasons ………

Ok, Mary Berry’s Key Lime Pie. Mary makes it in a similar way to her Lemon Meringue Pie and that went well so I made the biscuit base with confidence and put it in the fridge to set. The topping required the juice of four limes mixed with condensed milk and double cream. Well as much as I have been loving Mary’s recipes, they are very much on the rich side and as I have been watching my cholesterol intake and wanted to try some of this, I added the lime juice to “light” condensed milk and half fat creme fraiche and it seemed to work well. This also went into the fridge to set and then I had to remove it from the tin to add the final topping.

Mary asks you to whip the remaining double cream and add it to the pie and sprinkle the rind of a lime over the top. Well, I added the remaining creme fraiche which you can’t whip and mixed the grated lime rind to it. It may not look so spectacular but it’s better for the waistline.

Kim's lighter version of Key Lime Pie

The weekend is approaching fast and the christmas cake recipe is calling, so watch this space…….

Week Twelve – Marbled Chocolate Ring Cake

Week twelve and I feel like I have settled into this challenge now and look forward to what to make next. This week was a special week for me as I passed my Social Care with Children & Families Diploma, and with a Distinction too! Woohooo! So I was looking for this week’s inspiration with the view of a celebration and this fitted the moment, and I could do it in my mixer, as my thumb is on the road to recovery but not up to any hand mixing yet.

Mary Berry’s recipe called for a ring mould tin and to line this. Not as easy as it sounds so I thought I would look online to see if there any any hints and tips. Unfortunately I found nothing, zip, nada…….so decided to give it a go myself. It didn’t look pretty but it did the job!

The mix was pretty straightforward, just throw pretty much everything in a bowl and mix- my kind of cooking! Then add half this mixture in various places in the tin, add the cocoa/water mix to the rest of the mix , and then add to the tin. This should give it it’s marbled effect. Then into the oven for 40 minutes or so.

40 minutes later and the buzzer pinged, I looked at it but it was a bit underdone so I added another 5 minutes to the timer. Then it was done , time for a little cooling and then to tip it out. The paper lining worked well and came off easily and then the cake was left to cool.

The topping is pretty much dark chocolate, mixed with some butter and melted, then poured on the top. Mine covered the whole cake but didn’t look as smooth as Mary’s photo in the bible. This topping then needed to cool before the final drizzle of milk chocolate to finish it off.

I am pleased with the final result and can’t wait to cut into it to see how well the marbled sponge came out. Oh, and my certificate is in the photo – to prove that I did it and I can now add the following letters after my name – S.A.C. Dip……. very posh so……


signing off for week twelve’s efforts

Kim, S.A.C. Dip.